The main source of plausible deniability: Deniable Encryption
TLDR: VeraCrypt protects you against the threat of an adversary forcing you to type a password. Because depending on which password you type you either open the decoy volume or the hidden volume, and there's no way to prove or disprove the existance of the hidden volume. That's where you can safely store your sensitive data.

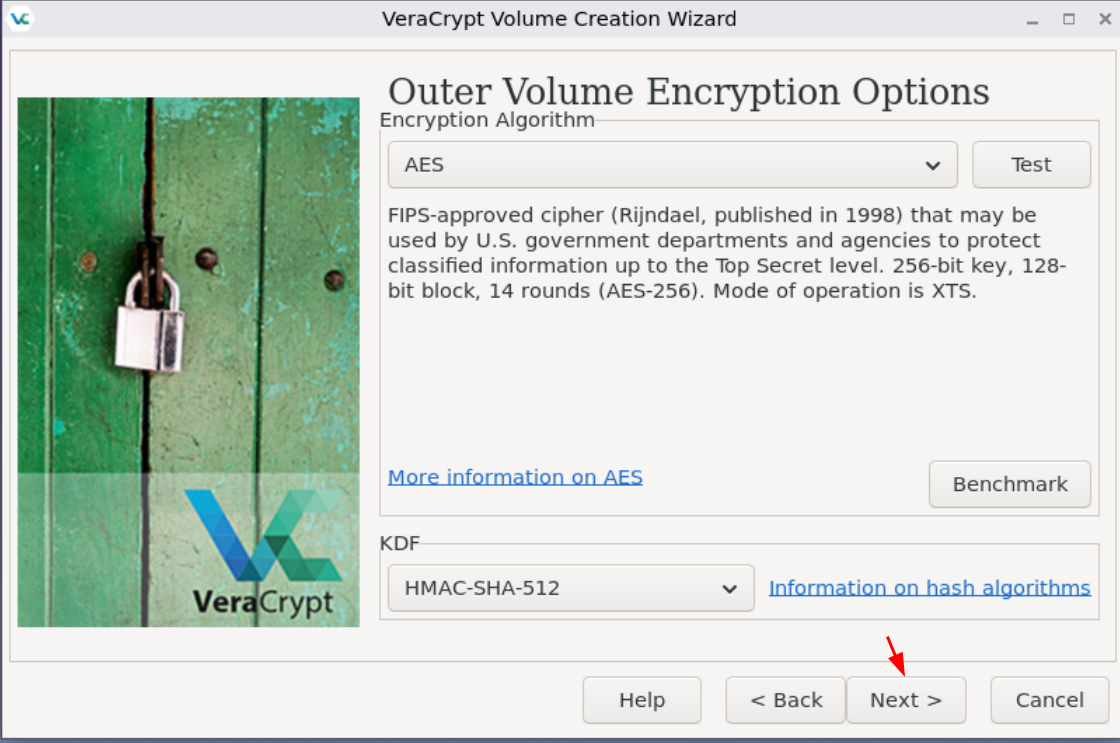
VeraCrypt is a free and open-source tool for encrypting files and volumes securely. Being based on TrueCrypt, VeraCrypt offers a unique feature called Hidden Volumes which can give us plausible deniability. VeraCrypt supports both TrueCrypt and VeraCrypt volumes while being better integrated in Linux ecosystem. However, it does not come installed by default in Kicksecure yet so we're going to need to install it ourselves manually.
But why is plausible deniability important?
From a legal perspective, depending on jurisdictions, you may be forced to type your password into an encrypted drive if requested. All it takes is for an adversary to be able to prove the existence of an encrypted drive to be able to force you to reveal the password to unlock it. Hence, for example the regular LUKS encryption is not enough, because you need to be able to deny the existence of the encrypted volume. If that is the case, we have to use VeraCrypt encrypted volumes, which is an encryption tool used to provide deniable encryption (which is what gives you plausible deniability) against that scenario where you're forced to provide a password.
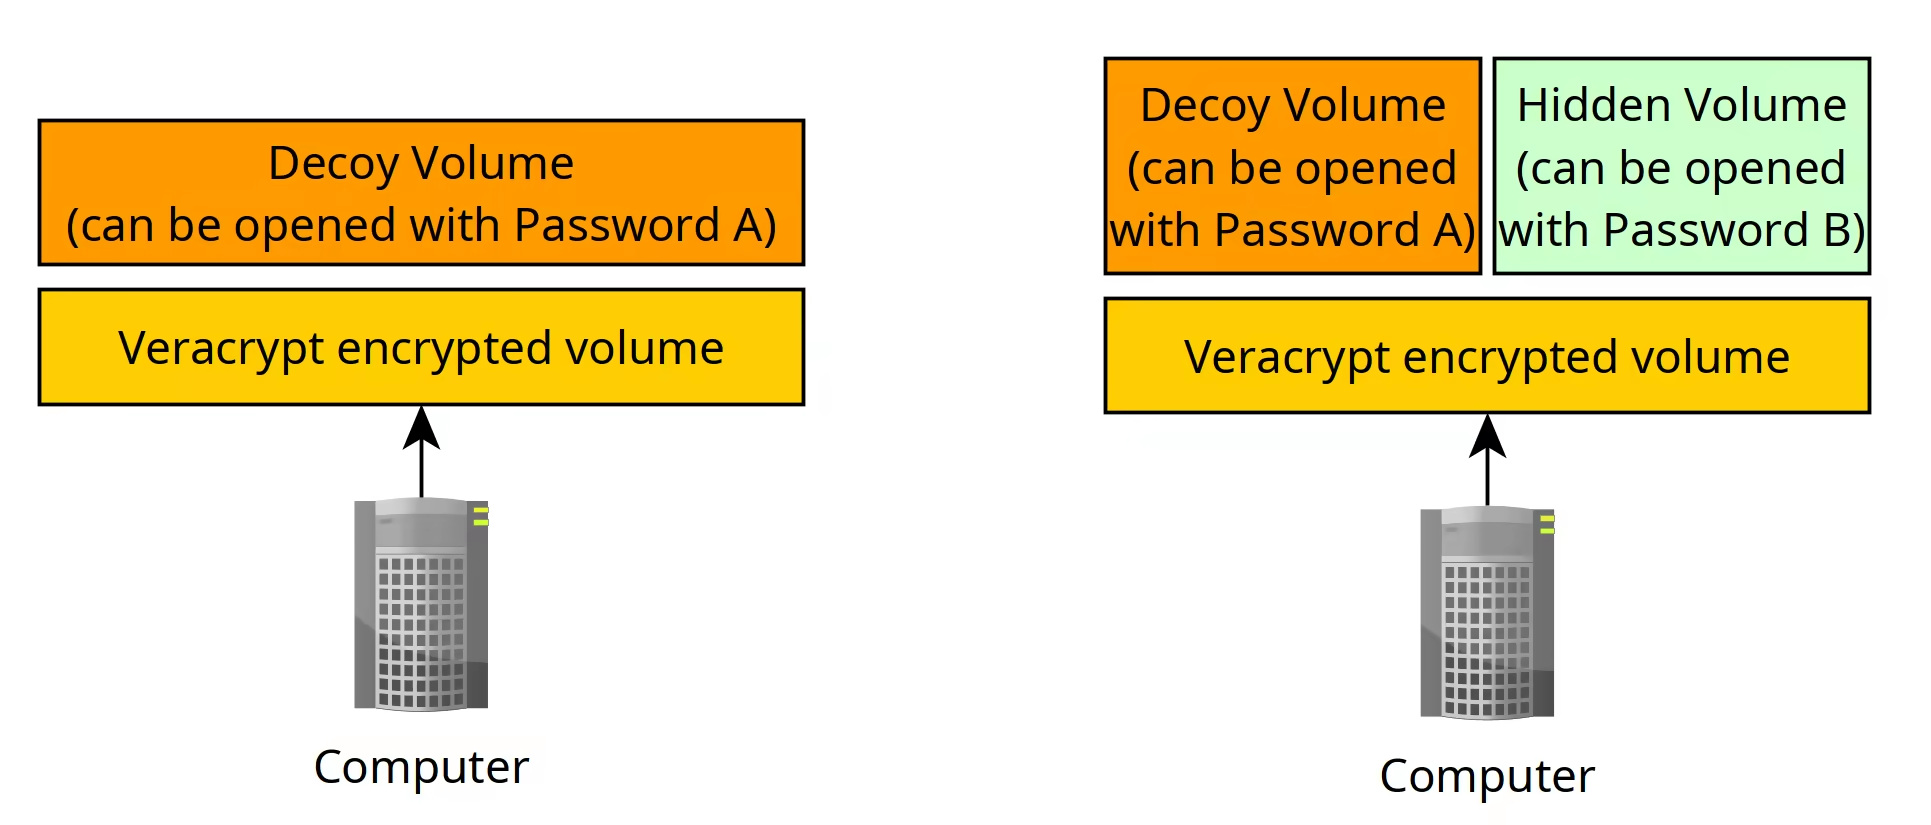
Using VeraCrypt encrypted volumes, you have a decoy volume which is there by default (that spans the entire encrypted volume) and you CAN have a hidden volume if you choose to, which is hidden in the decoy volume, it's also known as the "inner volume", and the only way to reveal that the hidden volume exists, is to use the correct secret password to both unlock it. If the encrypted volume doesn't exist, legally speaking you cannot be forced to unlock it, because it doesn't exist to begin with, as far as the adversary's concerned.
DISCLAIMER: we're using only hard drives (HDDs) here, because using SSDs are not a secure way to have plausible deniability, that is due to hidden Volumes being detectable on devices that utilize wear-leveling
source: https://anonymousplanet.org/guide.html#understanding-hdd-vs-ssd

regarding wear leveling:
"Also as mentioned earlier, disabling Trim will reduce the lifetime of your SSD drive and will significantly impact its performance over time (your laptop will become slower and slower over several months of use until it becomes almost unusable, you will then have to clean the drive and re-install everything). But you must do it to prevent data leaks that could allow forensics to defeat your plausible deniability. The only way around this at the moment is to have a laptop with a classic HDD drive instead."
WARNING: YOU NEED TO IMPLEMENT LIVE MODE AND RAM-WIPE ON THE KICKSECURE HOST OS TO IMPLEMENT THE FOLLOWING SETUP!
OPSEC Recommendations:
-
Hardware: (Personal Computer / Laptop)
-
System Hard Drive: not LUKS encrypted [1]
-
Non-System Hard Drive: 500Gb (used to contain our VeraCrypt encrypted volumes)
-
Host OS: Kicksecure
-
Hypervisor: QEMU/KVM
-
Packages: grub-live and ram-wipe
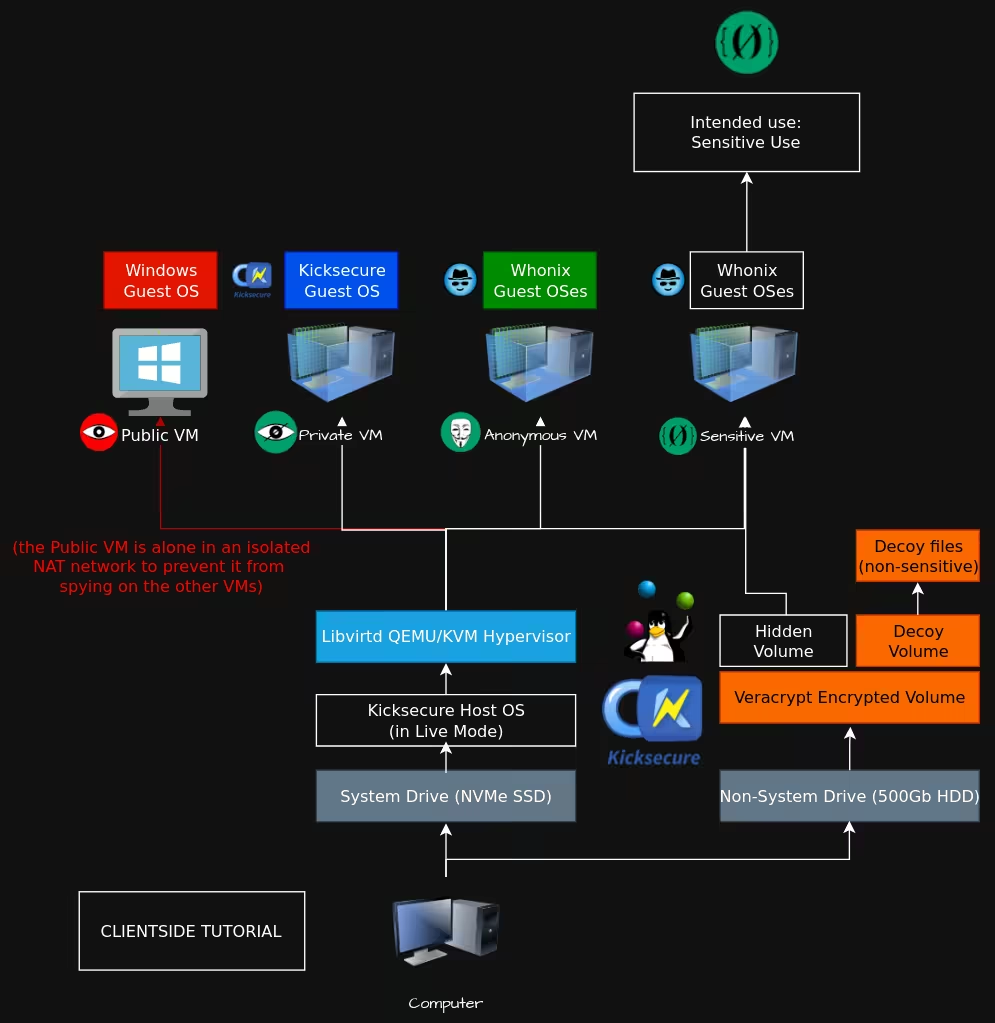
In this tutorial requires you to have implemented the following setup:
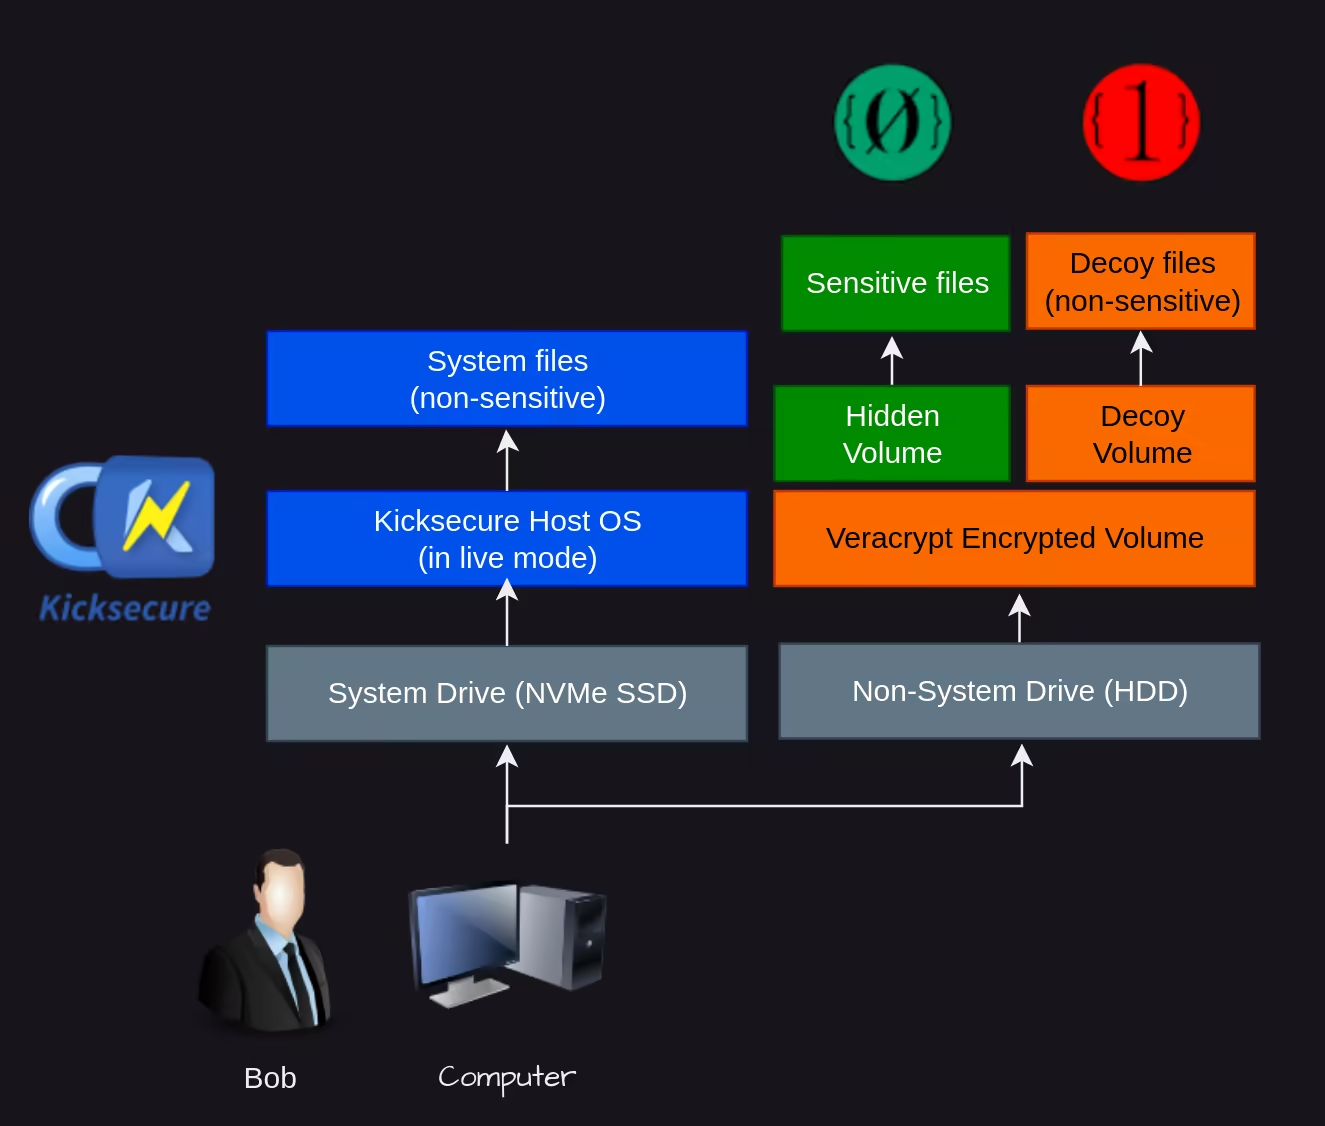
As we have explained previously the Host OS being in live mode is a crucial requirement to be able to maintain deniability, on top of erasing the contents of the RAM upon rebooting the Host OS, because we need to make sure that the adversary is not able to see what we were doing on the computer before they manage to get their hands on it. The VeraCrypt encrypted volumes are now going to enable us to store sensitive data that can be accessed again after rebooting. To do so, we need to save the VeraCrypt encrypted volume on a non-system drive, because if we were to store it on the system drive, it'd disappear when we reboot the computer to exit live mode !
Installing VeraCrypt
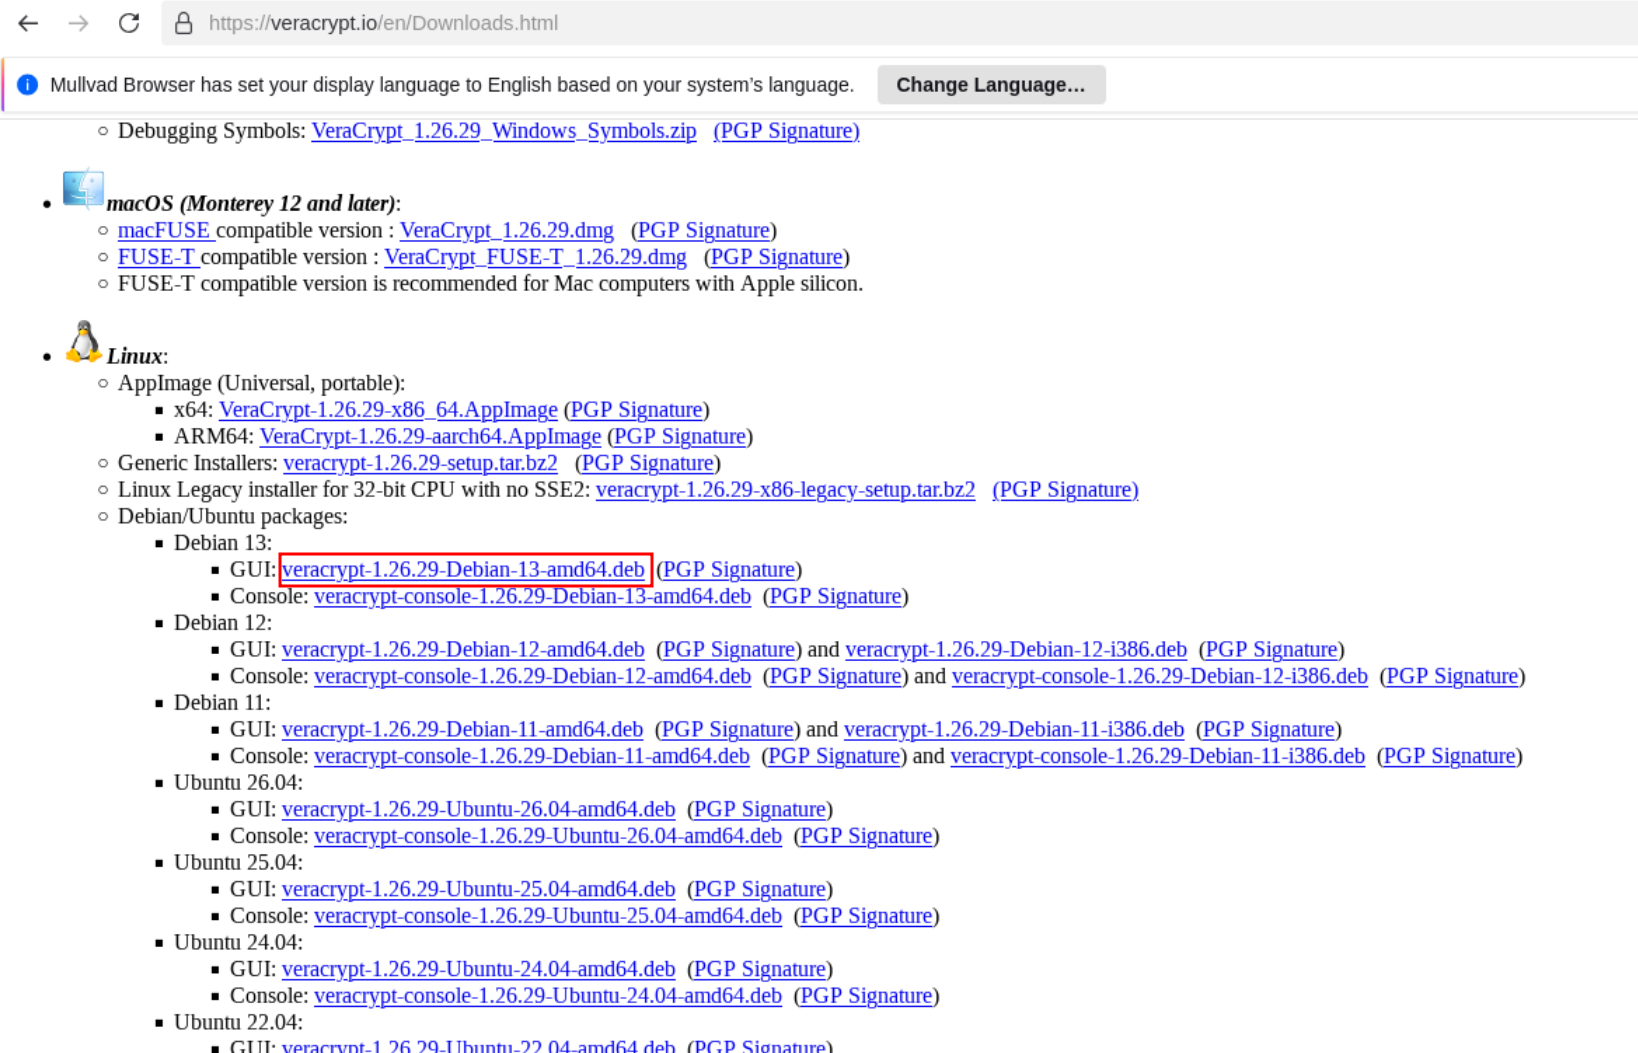
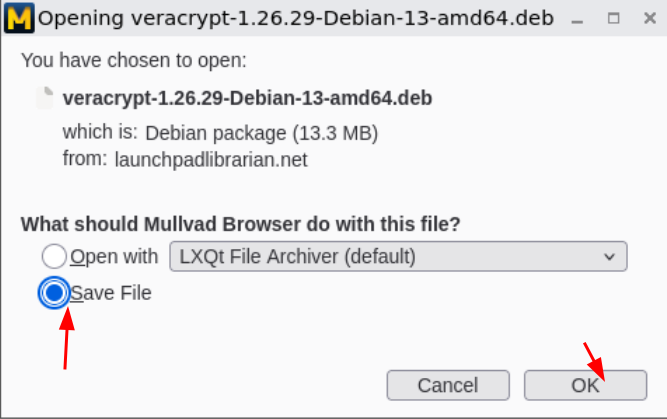
You can install VeraCrypt by downloading the latest .deb installer from the official website:
so we download it and install it:
[user ~]% sudo apt install exfat-fuse -y
[user ~]% cd .mullvad-browser/Downloads
[user ~/.mullvad-browser/Downloads]%  sudo dpkg -i veracrypt-1.26.29-Debian-13-amd64.deb
[user ~/.mullvad-browser/Downloads]%  sudo apt install -f -y
[user ~/.mullvad-browser/Downloads]%  sudo dpkg -i veracrypt-1.26.29-Debian-13-amd64.deb
So now you have VeraCrypt on your system. However before you start to use it, make sure that your Host OS is in live mode, as otherwise you wouldn't be able to maintain your deniability regarding the existence of the VeraCrypt hidden volume, because of the forensic traces you can leave behind on the system drive (log files, cache files, temporary files, etc.)
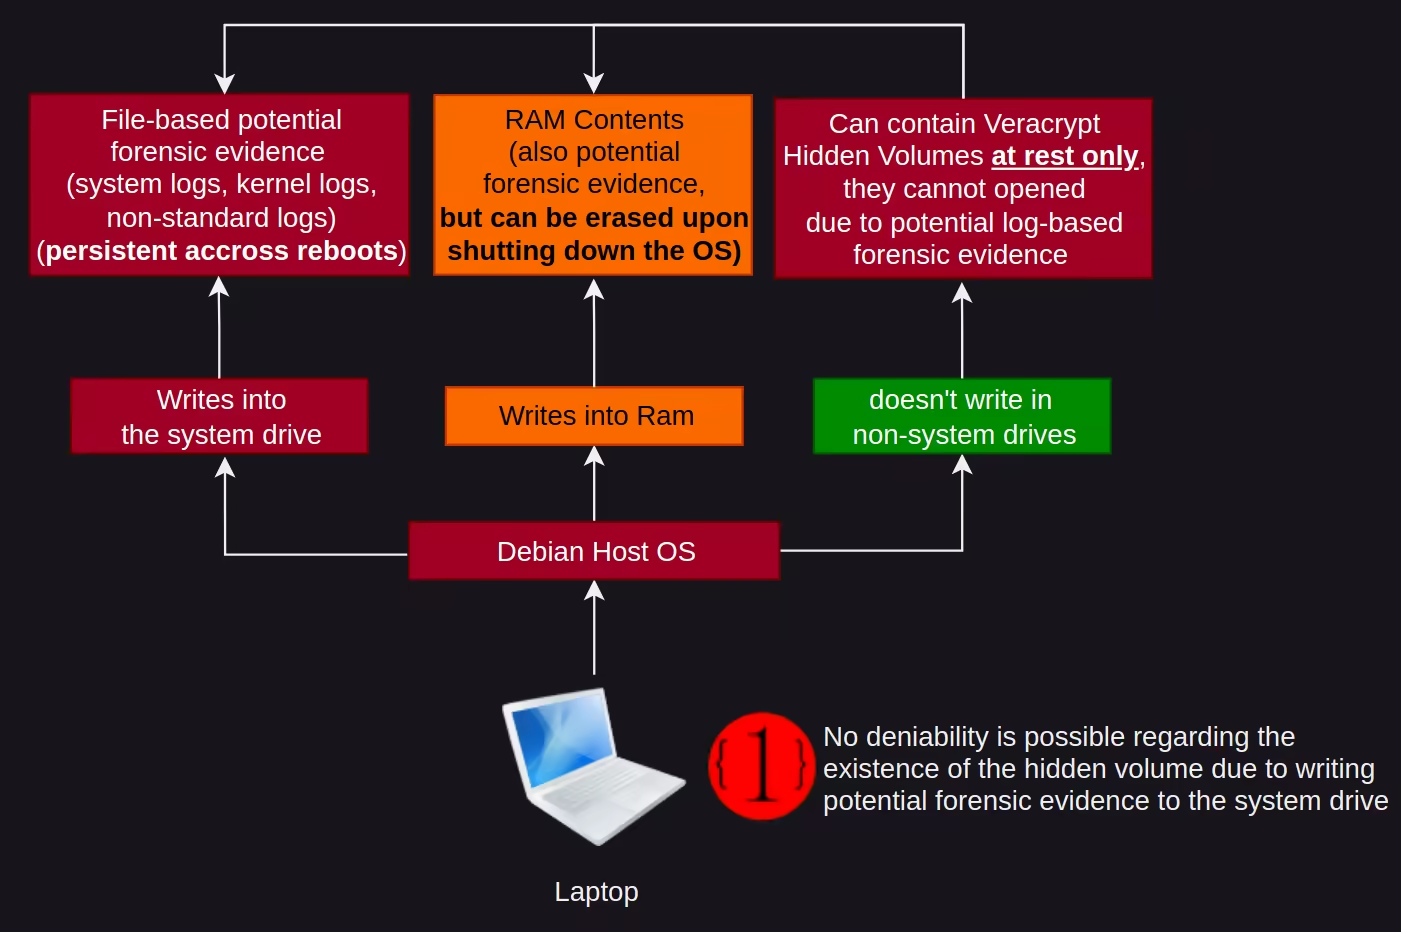
By default, your host OS directly writes into the system drive all sorts of potential forensic evidence that an adversary may use against you, such as system logs, kernel logs, non-standard logs, etc., and unless if you remove each of those manually, you're never sure of whether the Host OS saved proof of the existence of the hidden volume onto the system drive. That's why when you handle VeraCrypt hidden volumes (creating them or opening them) you absolutely need to use the Host OS in live mode ONLY!
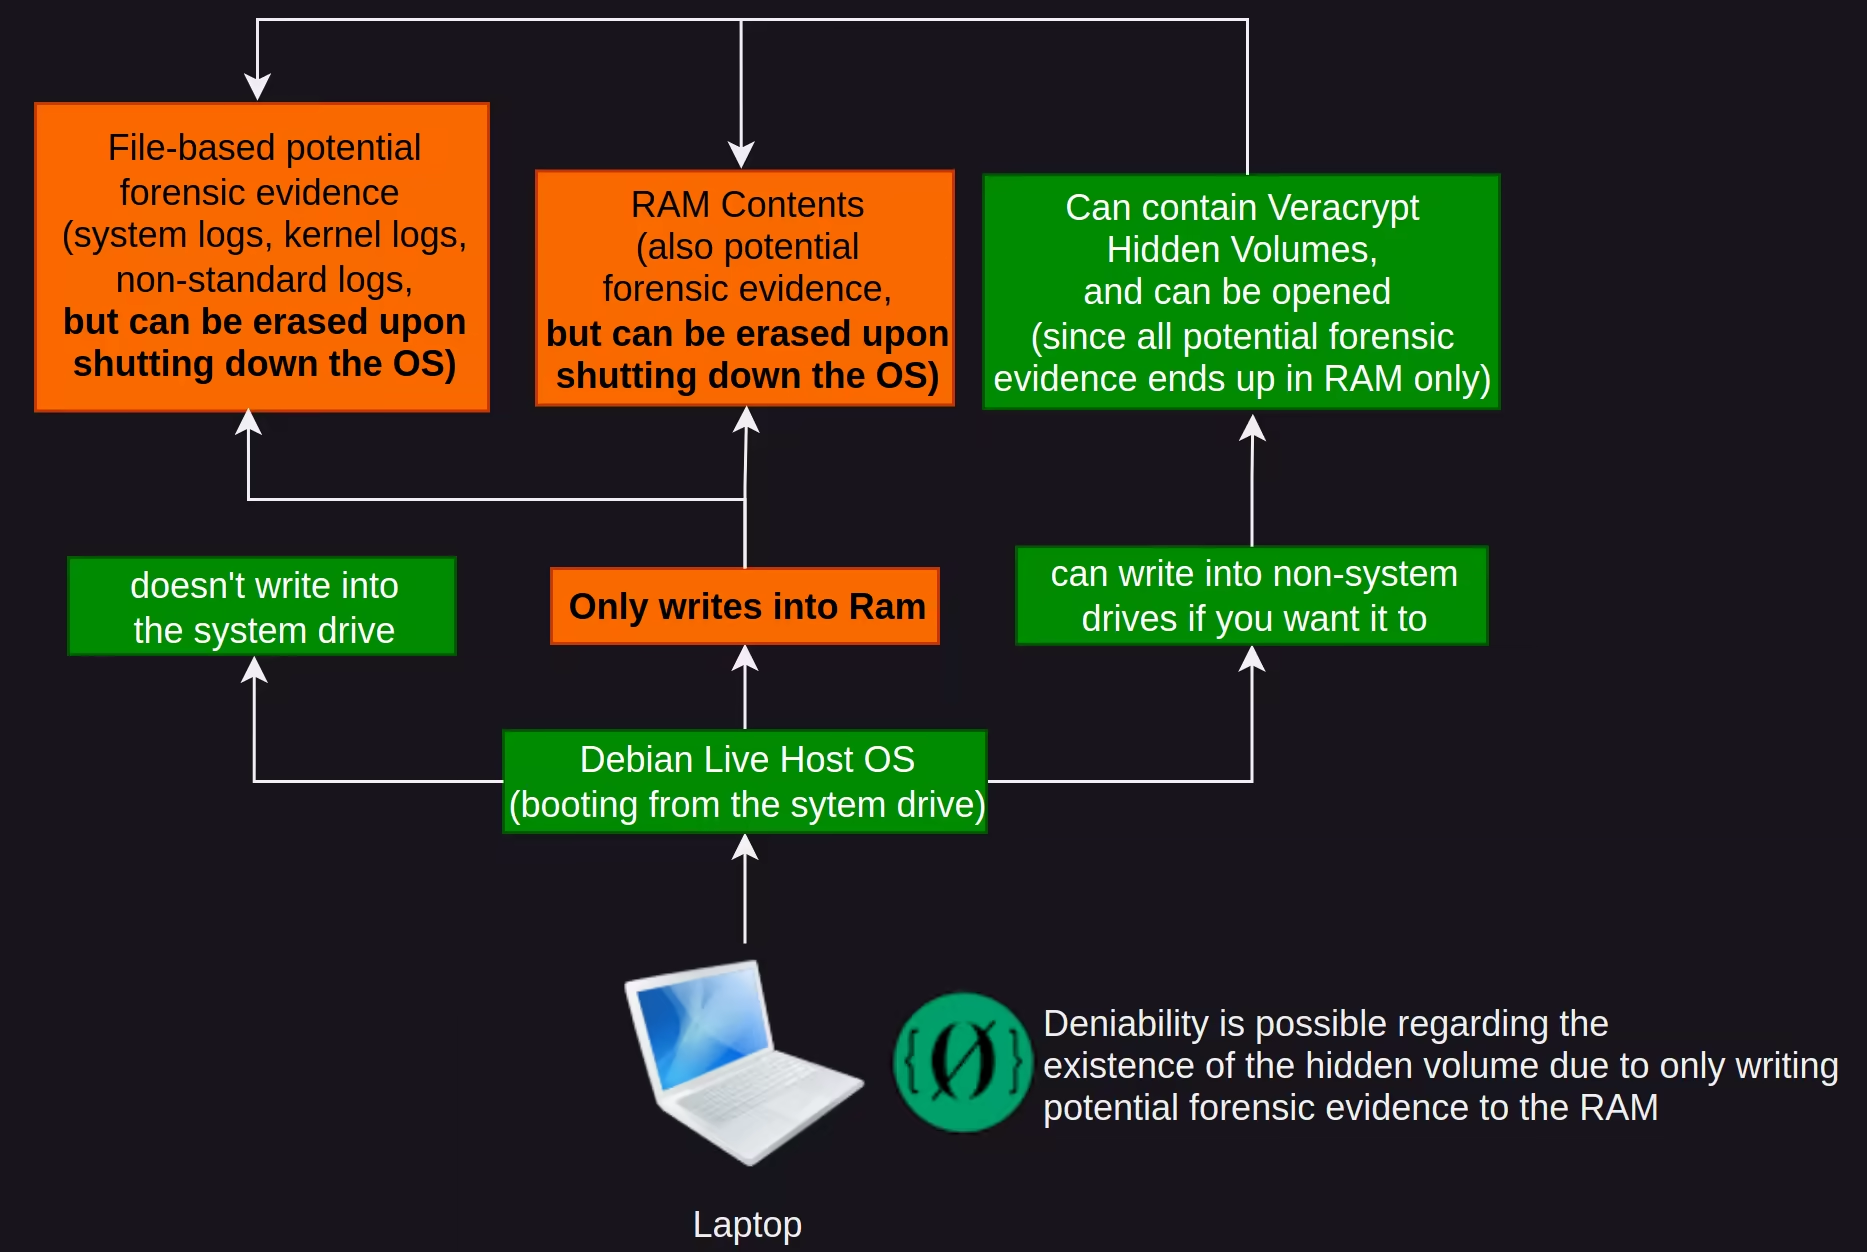
When the Host OS is in live mode, you're loading the entire host OS in the RAM, meaning that you are not writing anything on the system drive anymore, but rather you are only writing all that potential forensic evidence of the VeraCrypt hidden volume in RAM alone, which can be easily erased with a simple shutdown thanks to both live mode and ram-wipe.
So if you didn't do it already, reboot the Host OS into live mode:
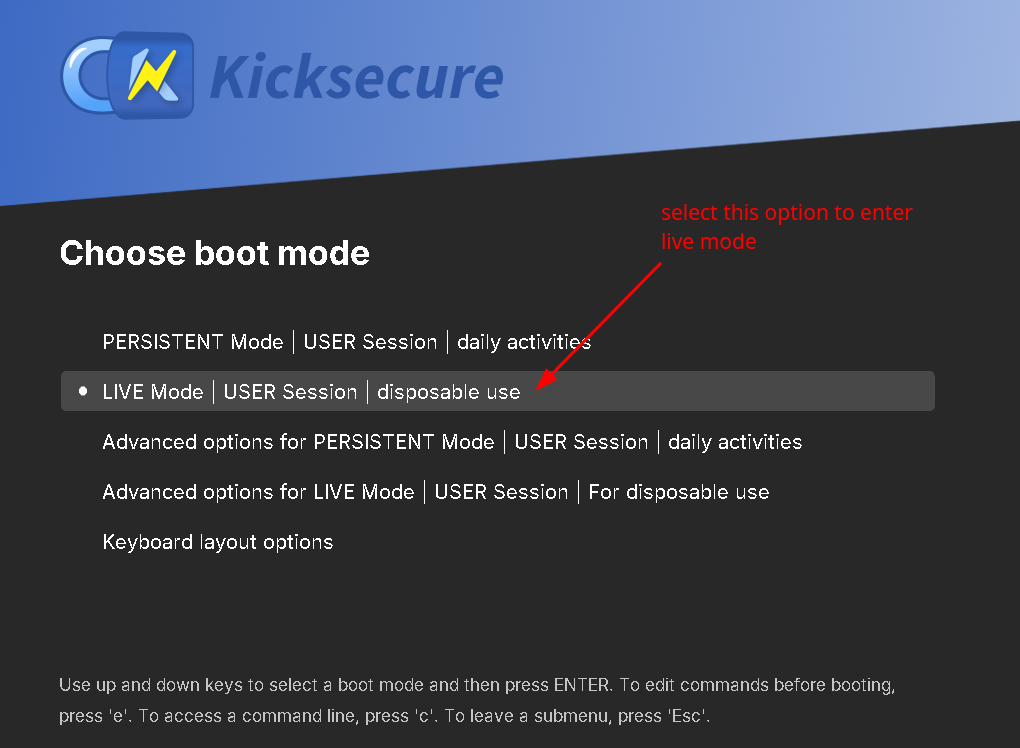
And only now once we are in live mode, we can use VeraCrypt to create hidden encrypted volumes and unlock them. But be aware that everything you write into the system drive will be wiped upon shutting down, if you want to store something persistent across reboots from live mode, you need to save it in a non-system drive.
[user ~]% lsblk
NAME                                          MAJ:MIN RM  SIZE RO TYPE  MOUNTPOINTS
vda                                           253:0    0   30G  0 disk
├─vda1                                        253:1    0    4G  0 part  /boot
└─vda2                                        253:2    0   26G  0 part
  └─luks-24351c83-3657-4142-82d2-8f8a5787f406 254:0    0   26G  0 crypt /live/image
vdb                                           253:16   0   10G  0 disk
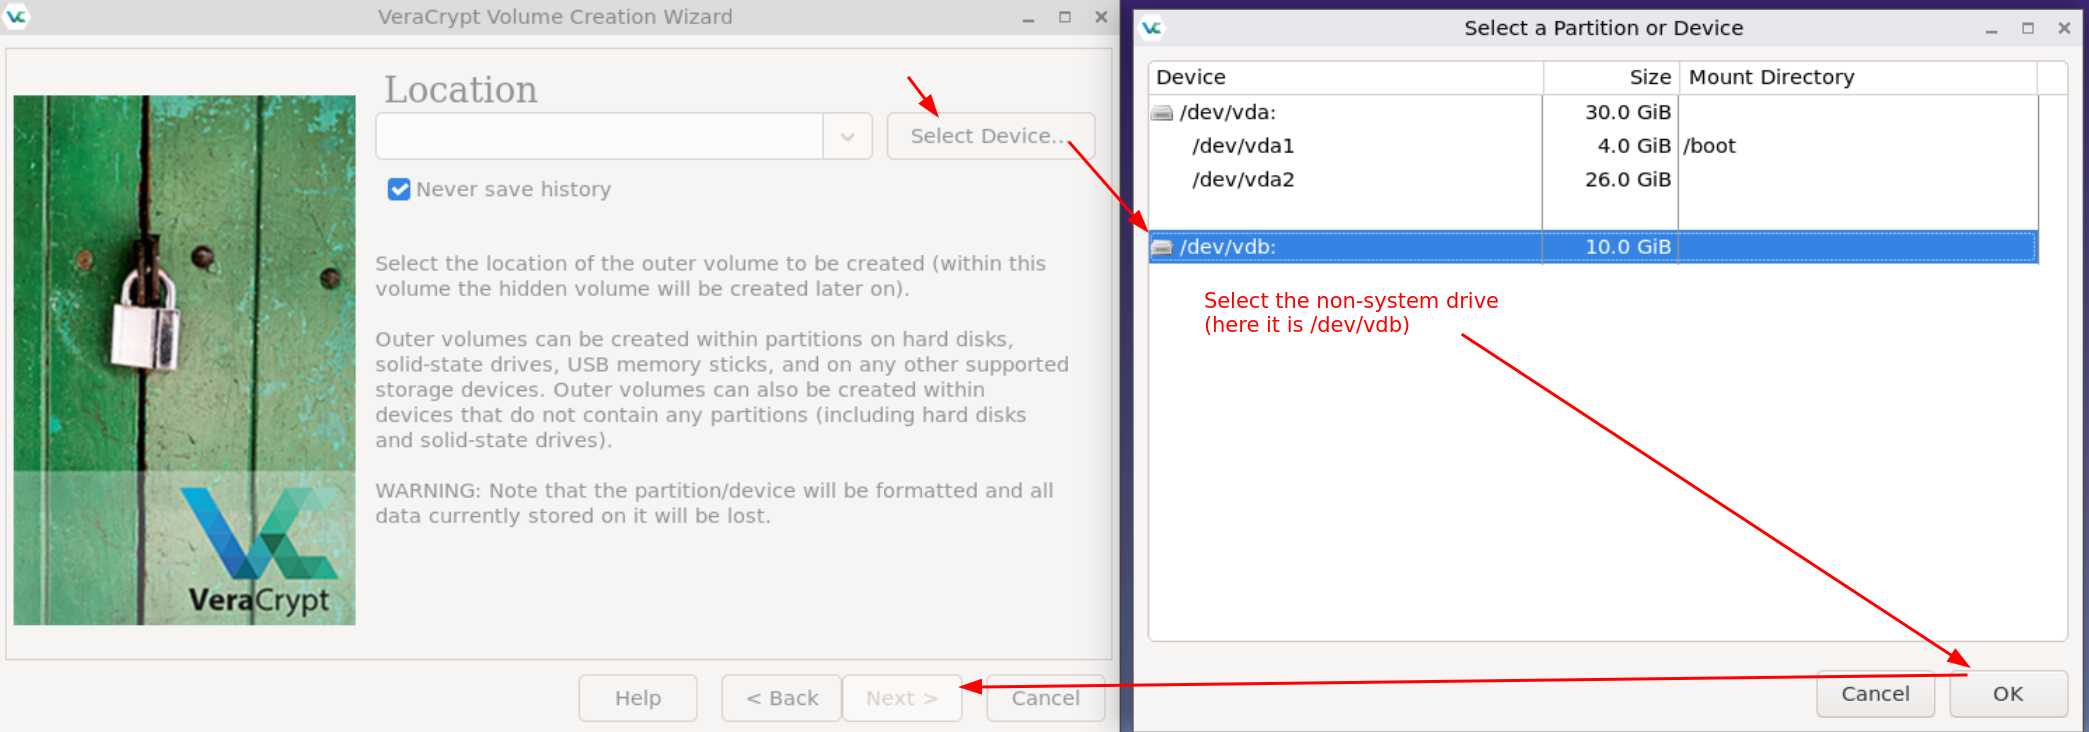
Here as you can see we have a non-system drive called /dev/vdb1, which, for our current testing purposes is only 20 GB big. Before we start encrypting it, let's format the hard drive using mkfs.ext4 to make sure the vdb partition is available for us to use:
[user ~]% sudo mkfs.ext4 /dev/vdb
Here take note that we need to
[user ~]% veracrypt
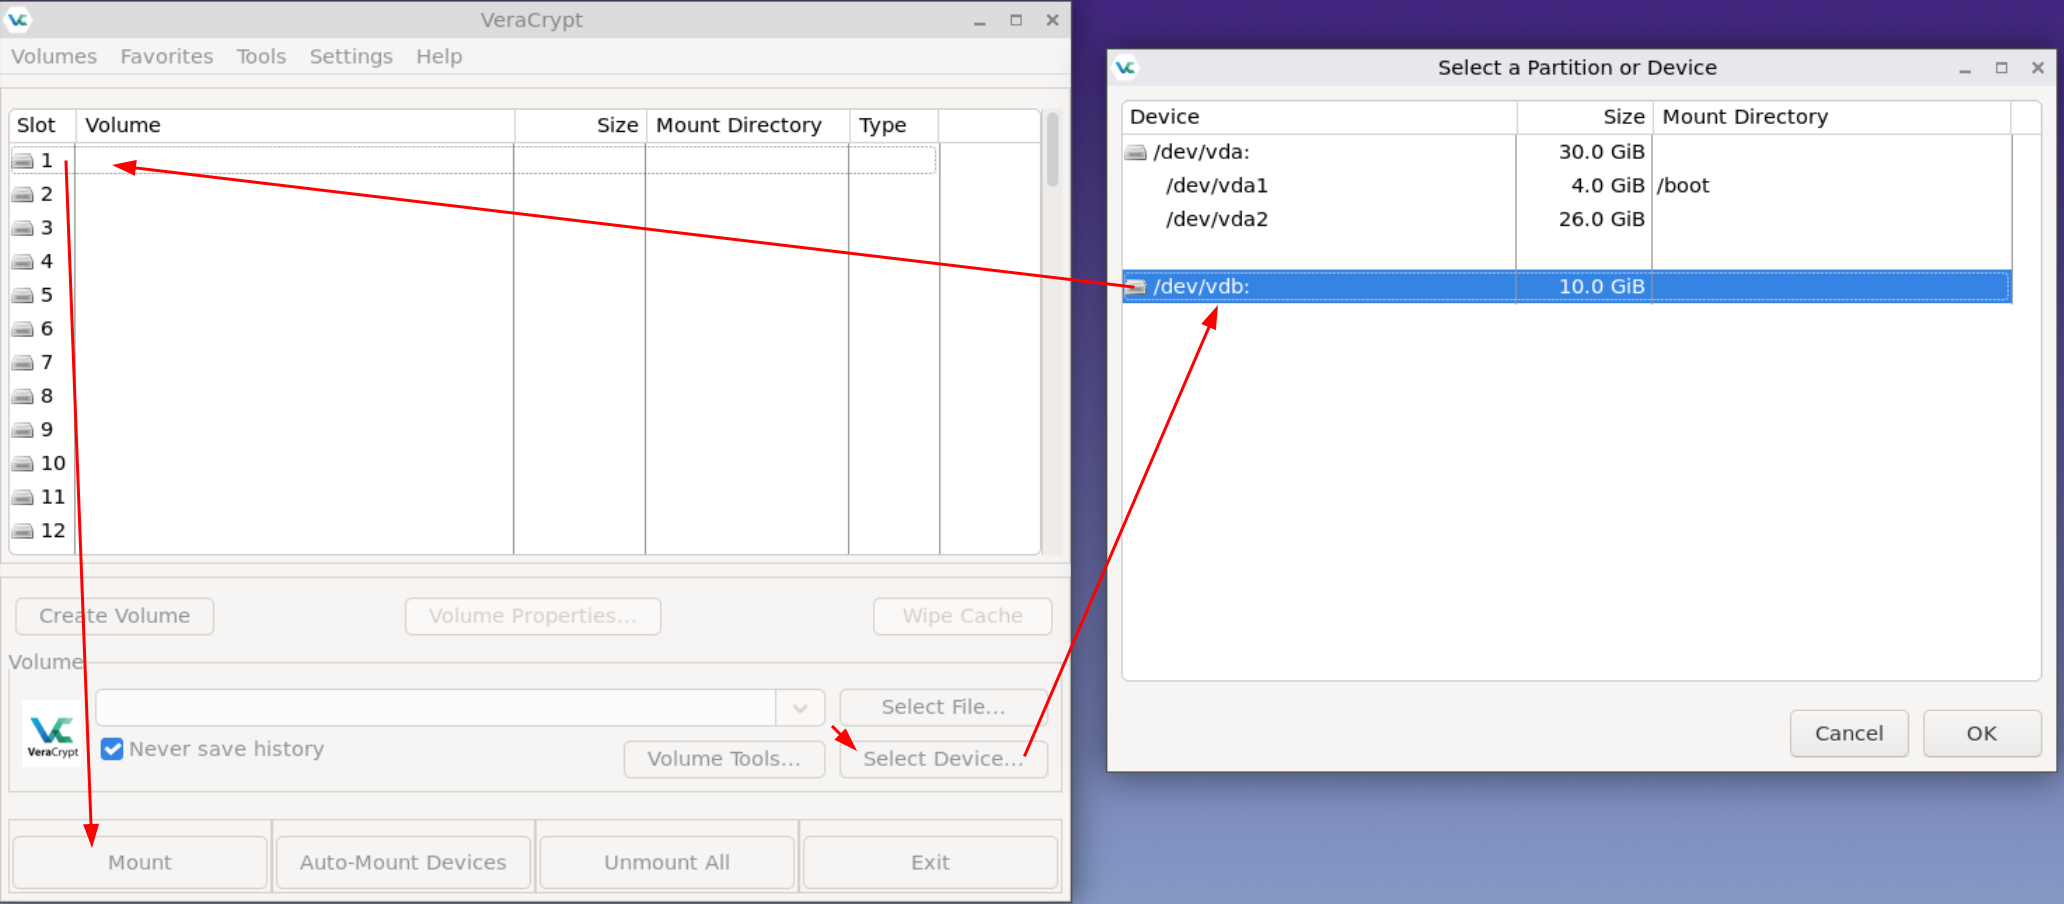
Now that the /dev/vdb1 partition is available for us to use, let's create the VeraCrypt encrypted volume which will span the entire non-system drive:
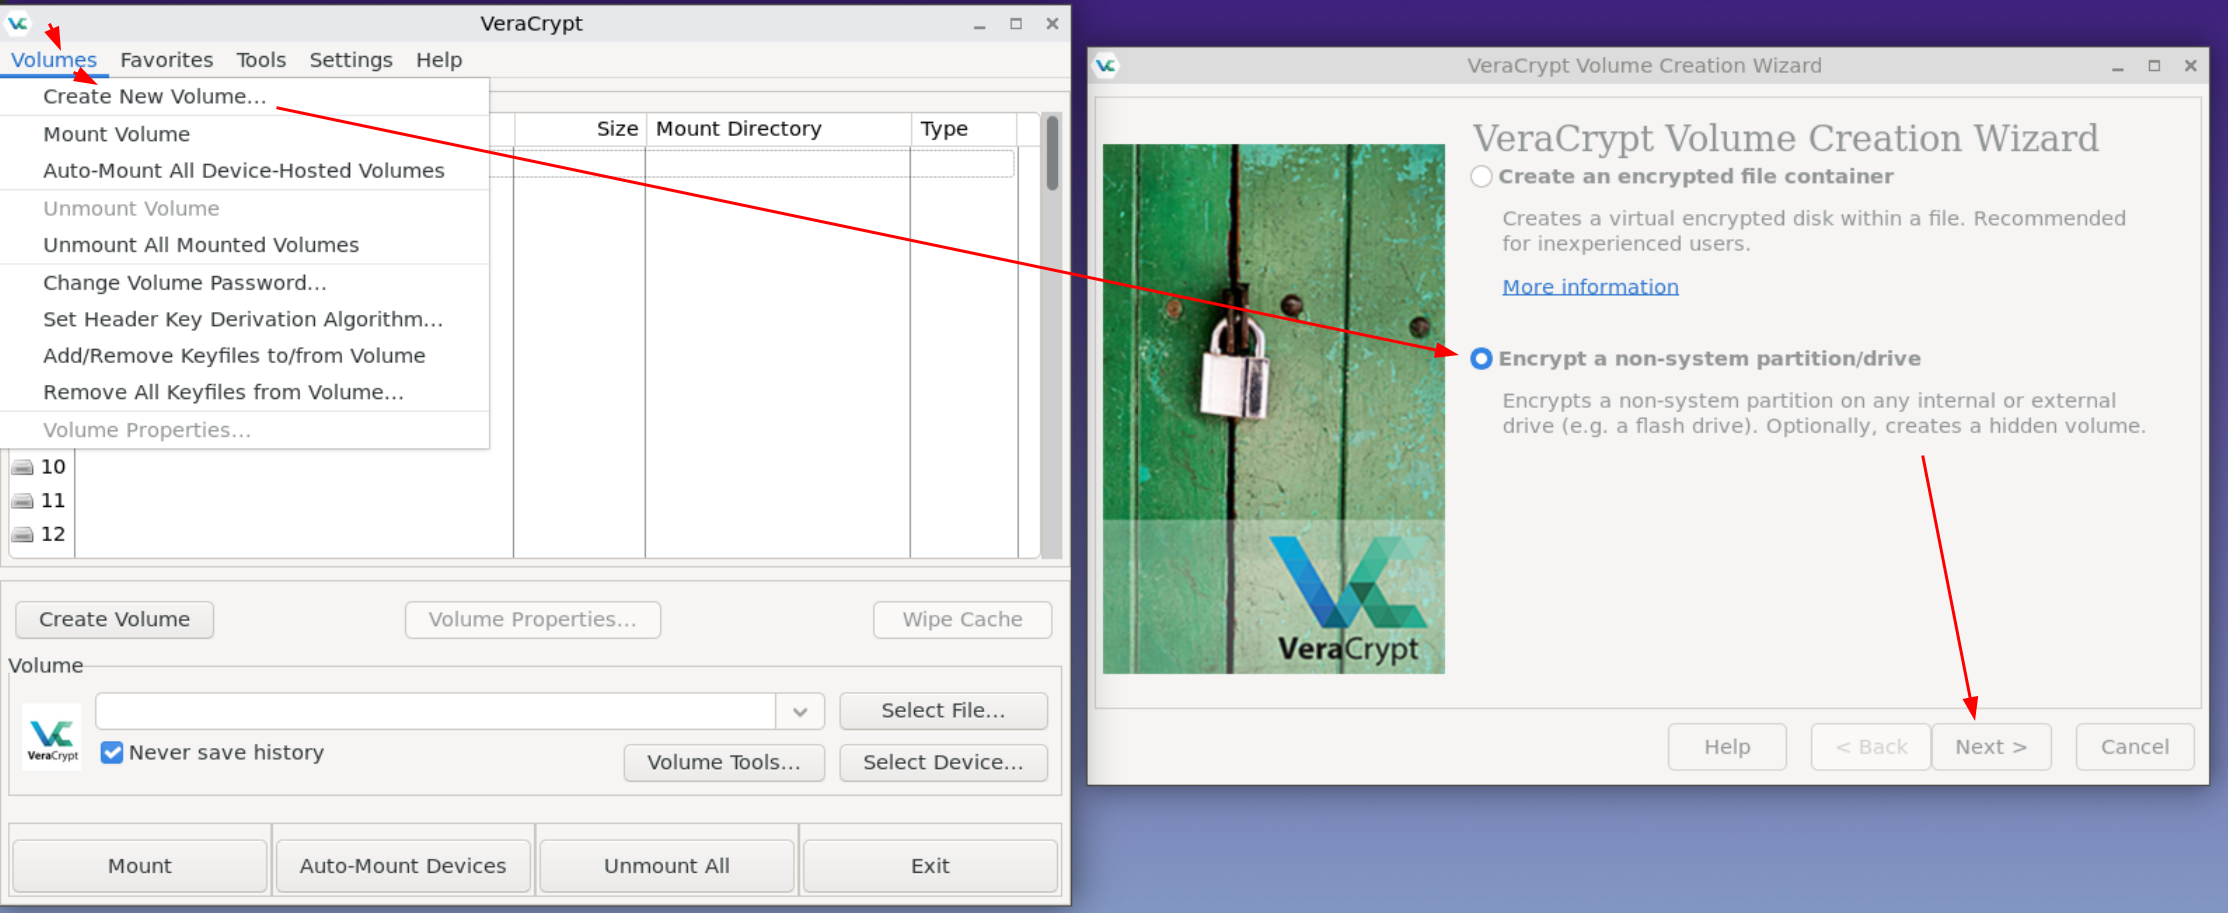

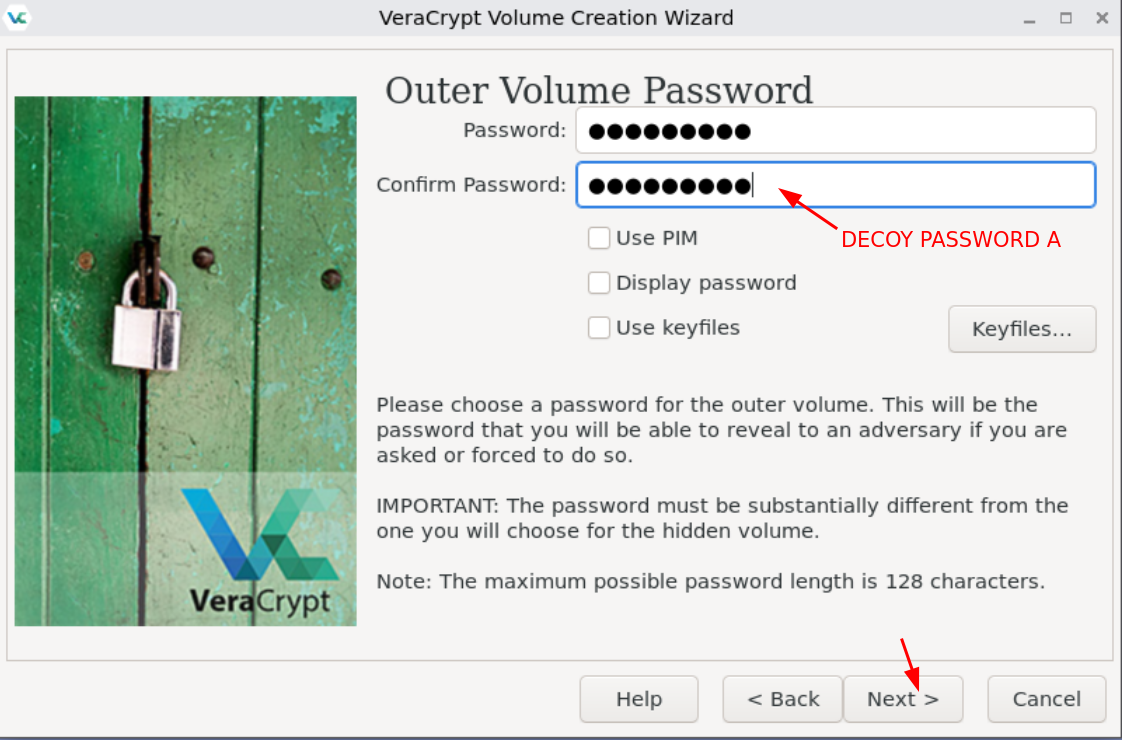
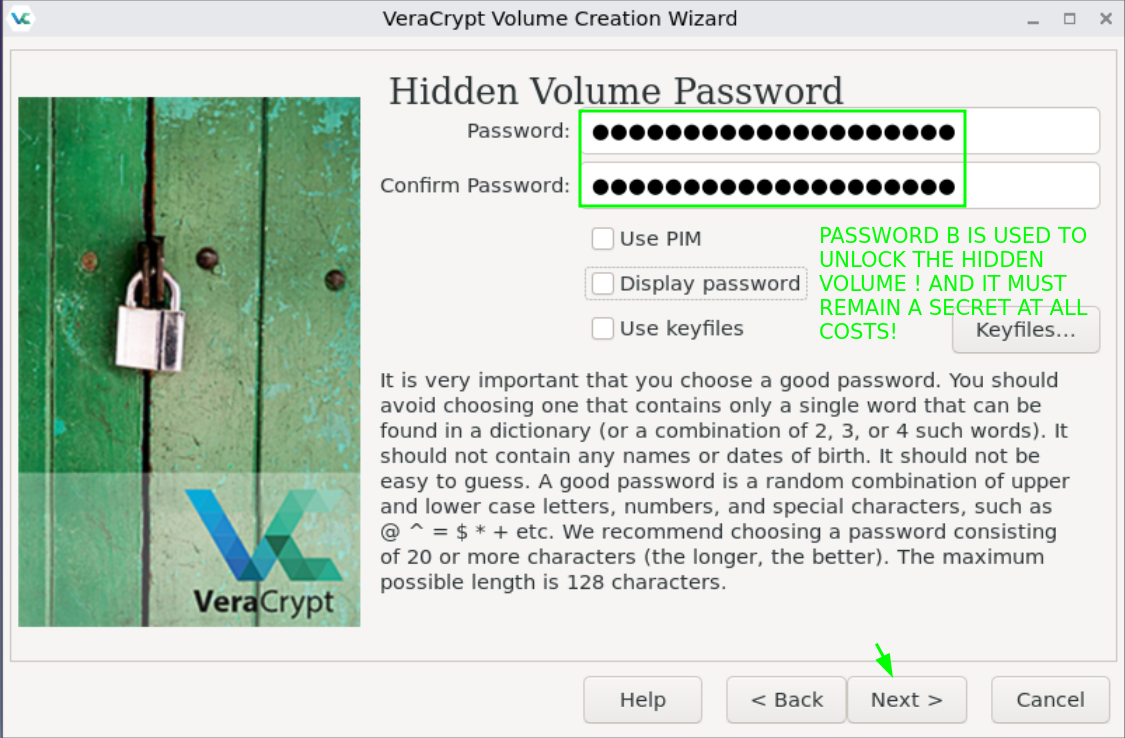
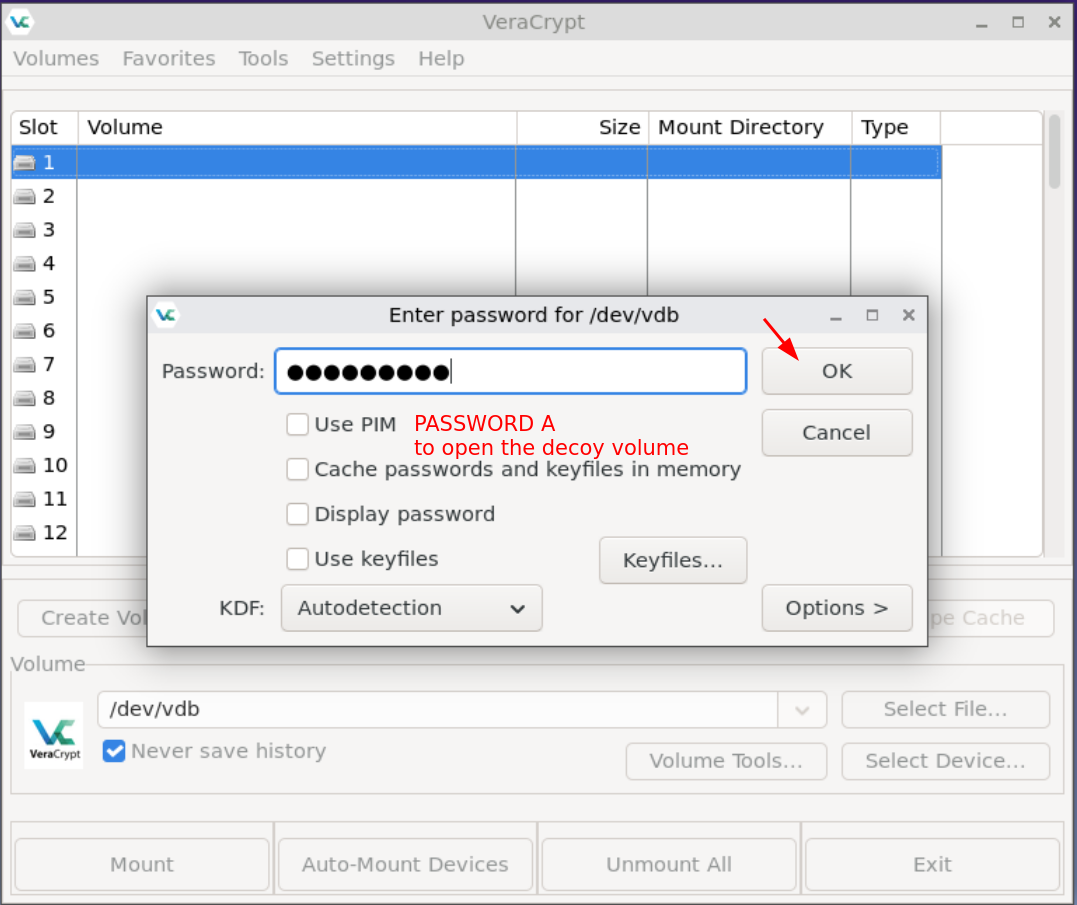
Here is the important part: you need to mention Password A for the decoy volume (which is the outer volume, it will span the entire disk), and you need to mention Password B for the hidden volume (which is the hidden VeraCrypt volume where we'll be able to store our sensitive files)
So let's first set up the Outer (decoy) volume password:
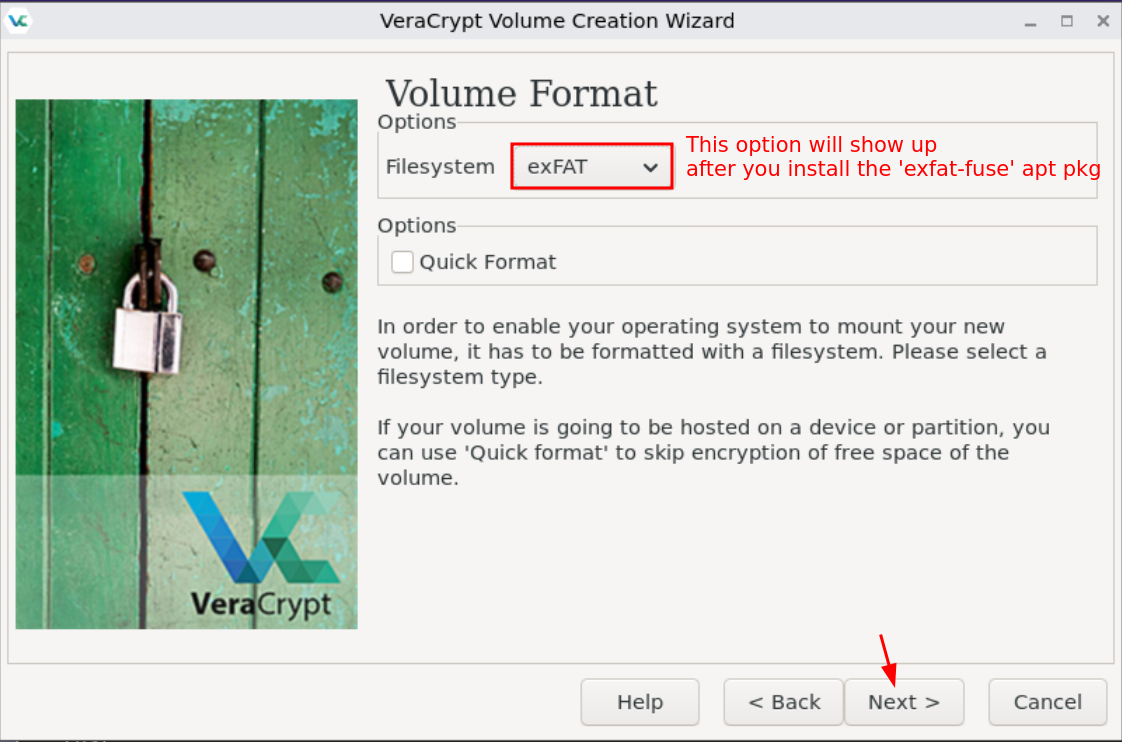
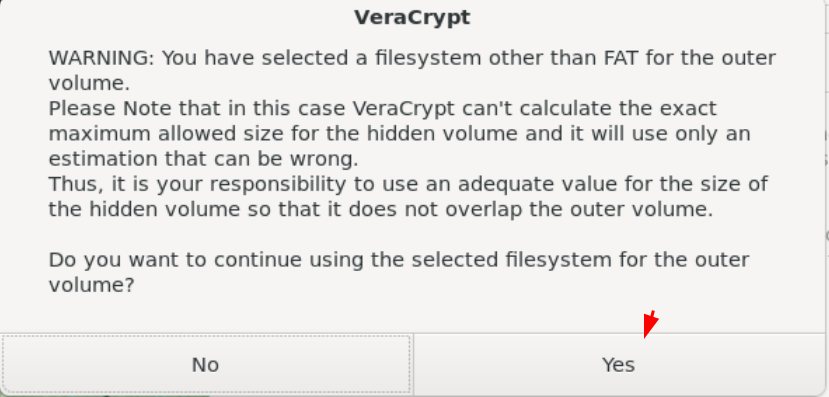
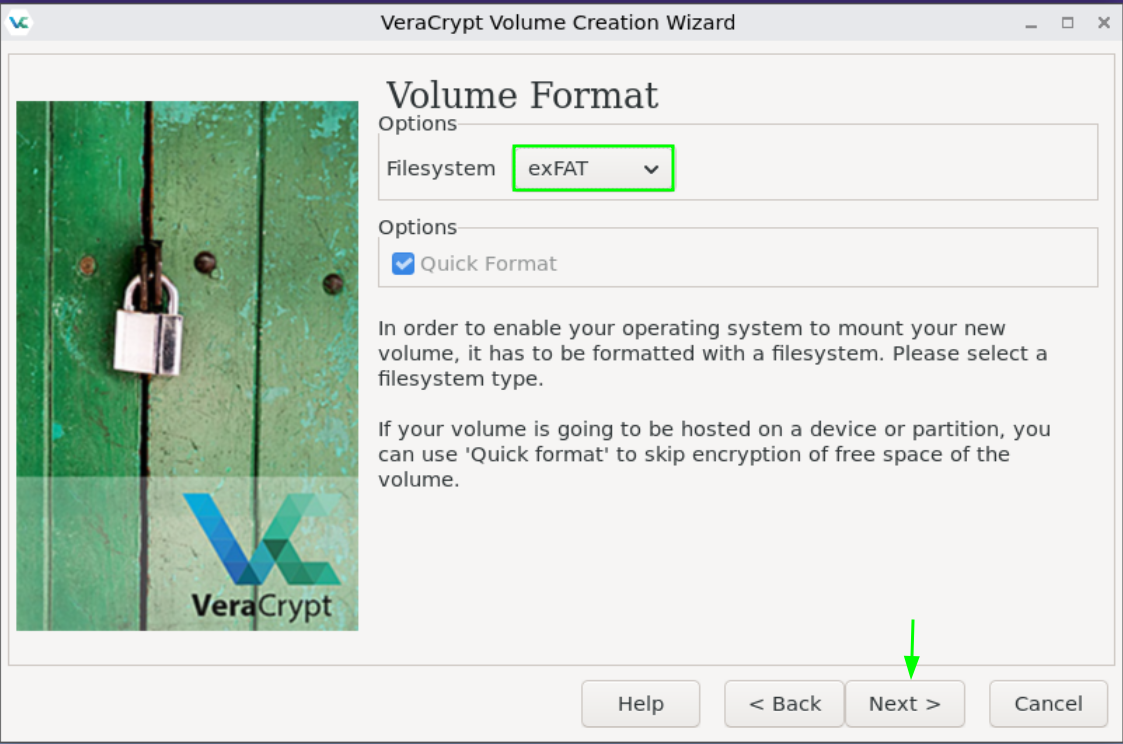
WARNING (11/05/2025): Do not use the default ext4 file system type for VeraCrypt volumes, as writing in an ext4 decoy volume may overwrite the hidden volume at random (I tested it by writing a random 100mb file in a 300mb ext4 decoy volume, and it started overwriting the hidden volume, unlike with an exFAT file system), therefore we need to use the exFAT file system, to prevent this problem:
(Special thanks to VioletSentiment for finding this btw, since I overlooked it initially)
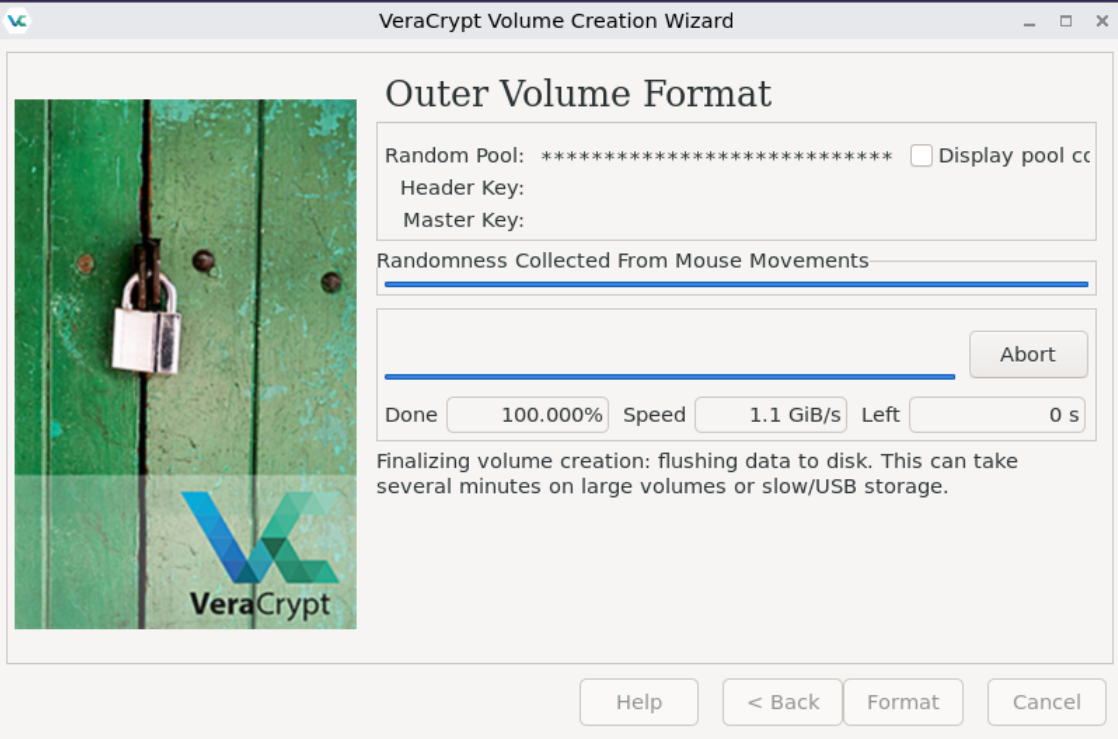
Then wait for it to create the outer volume, as it can take a while:
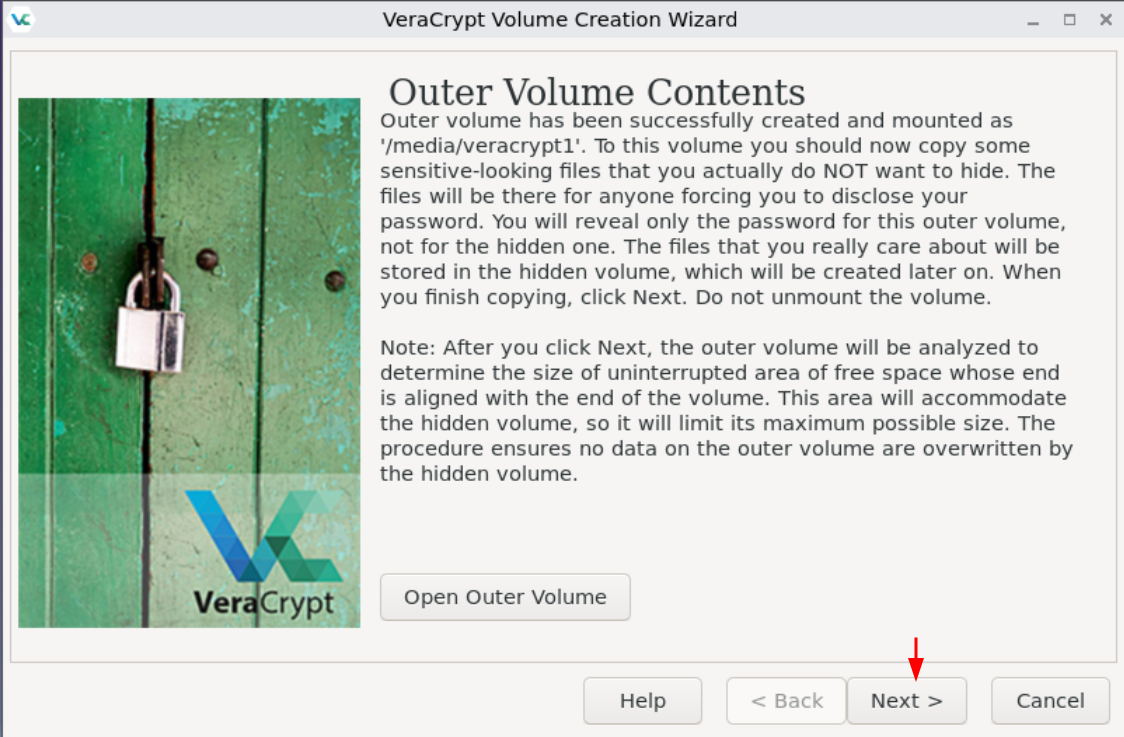
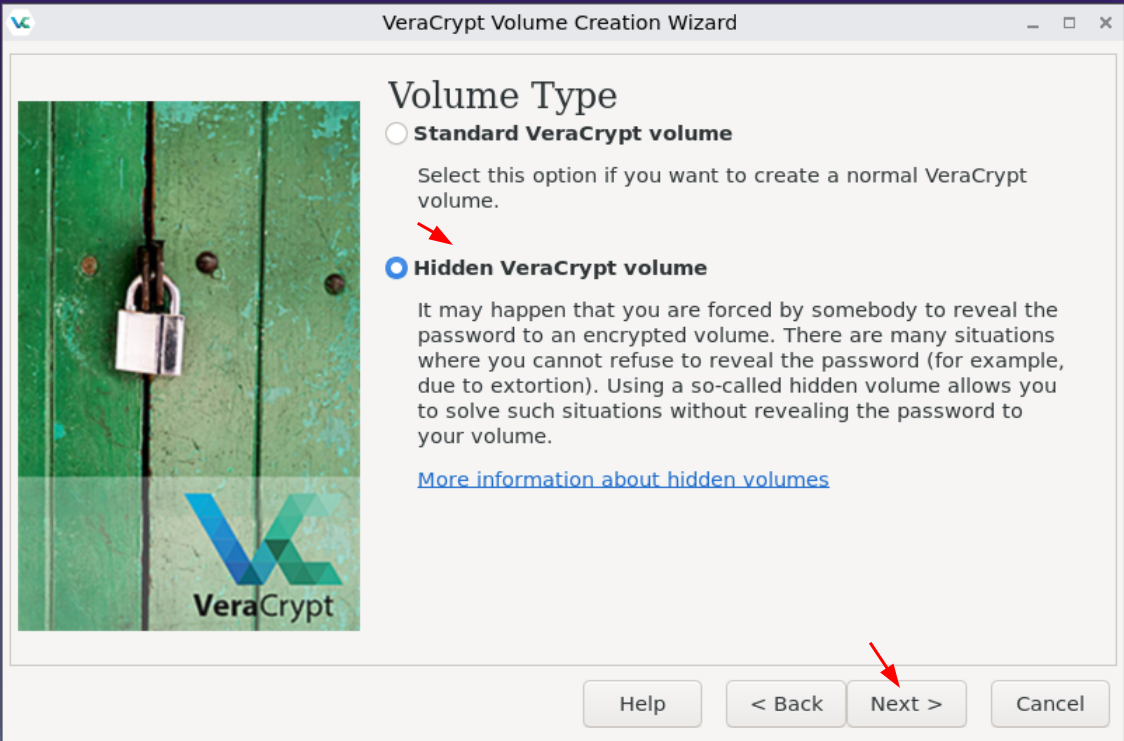
then let's create the hidden volume:
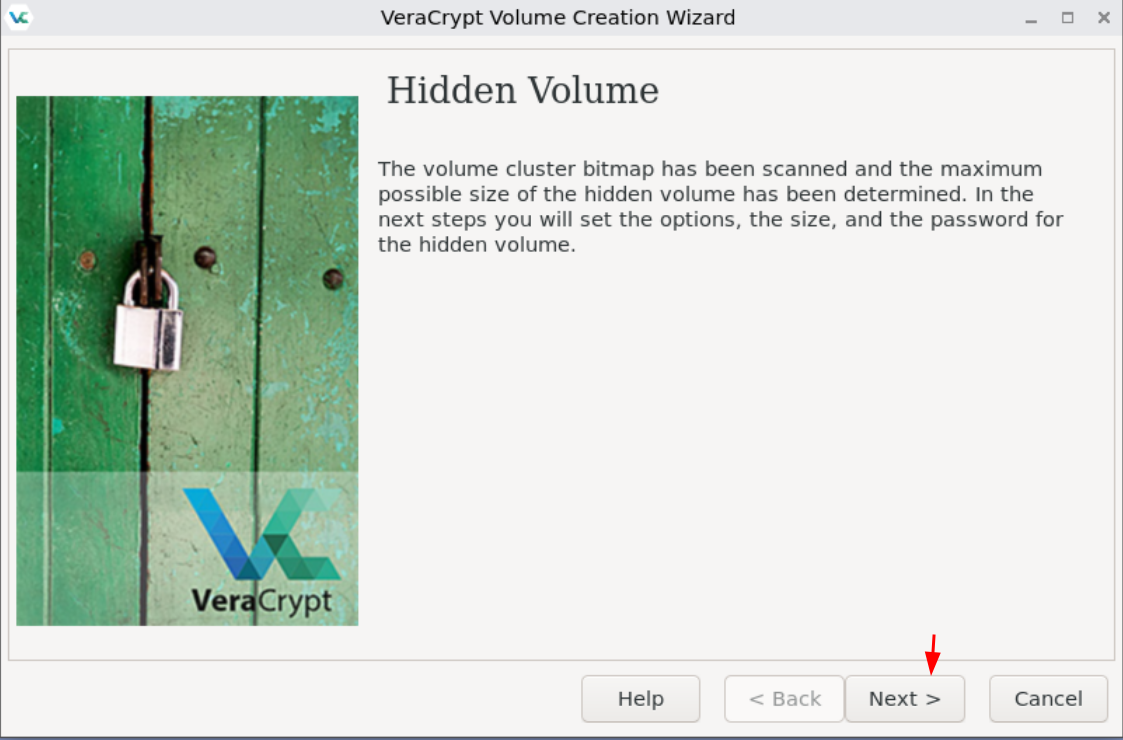
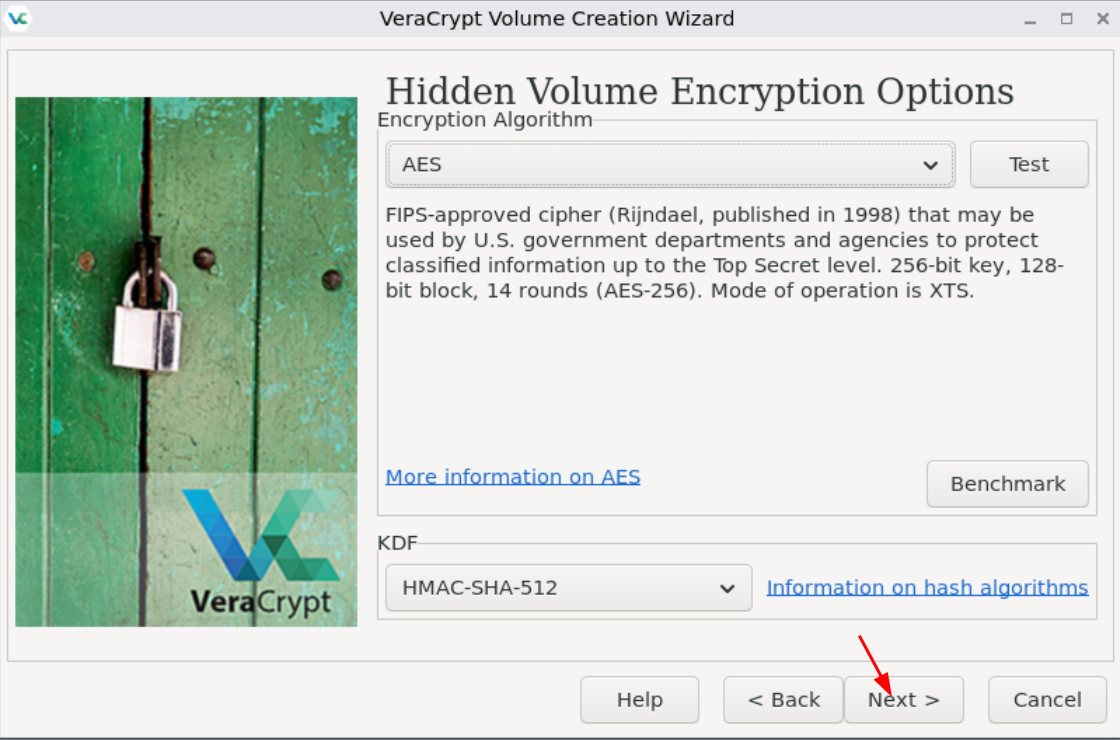
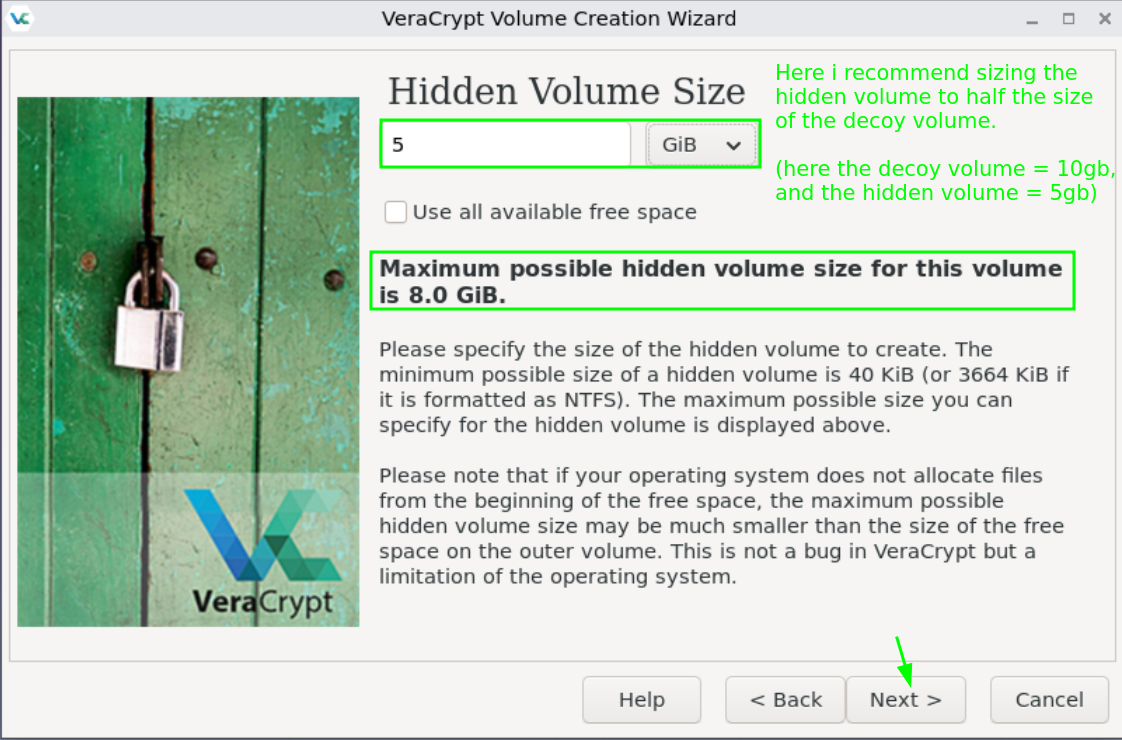

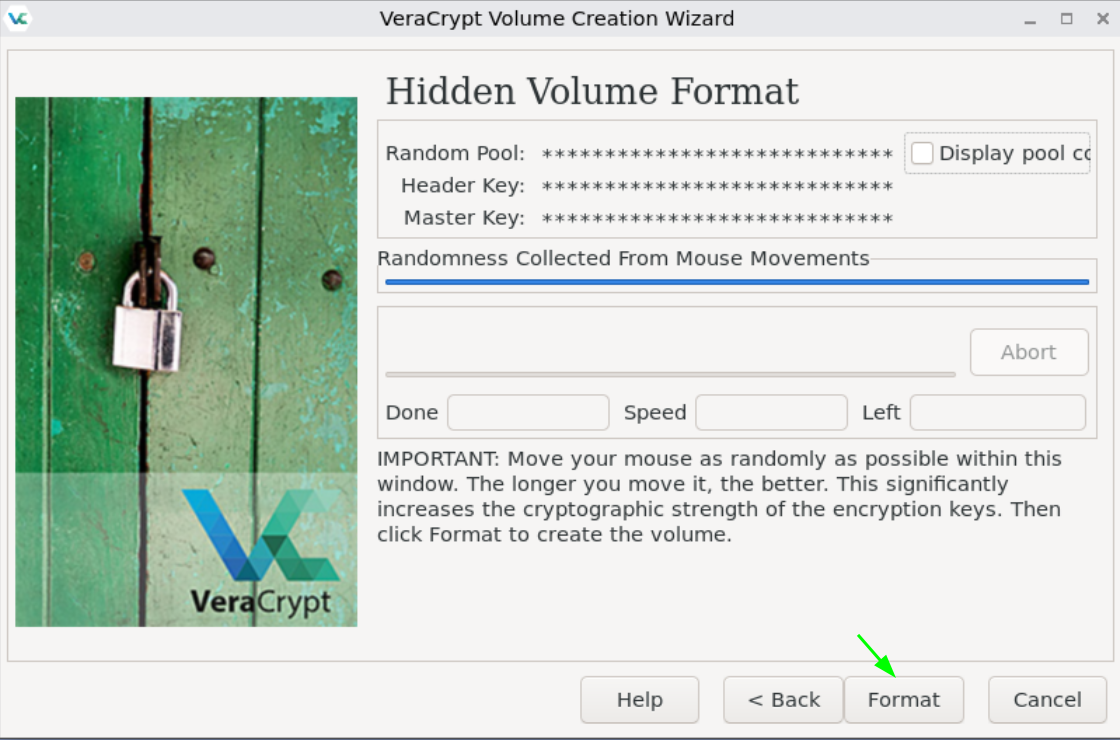
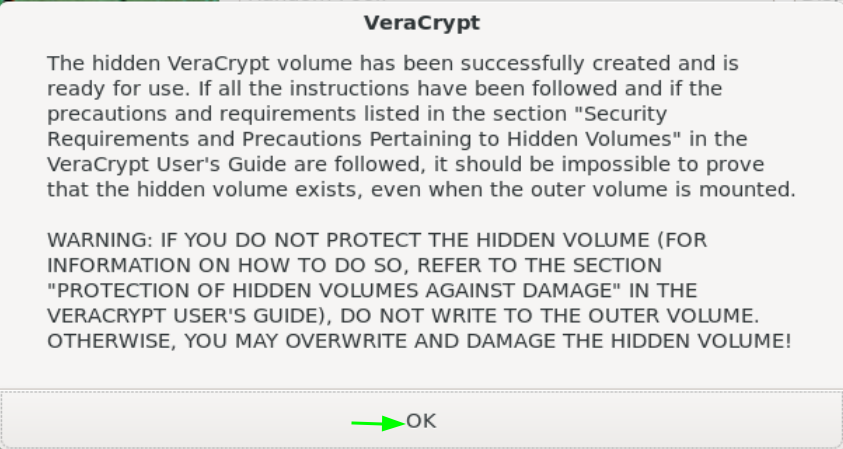
then wait a bit to let it create the hidden volume:
And now that we're done we can test to mount the decoy volume :
And here as you can see we successfully mounted the decoy volume under /media/veracrypt1:
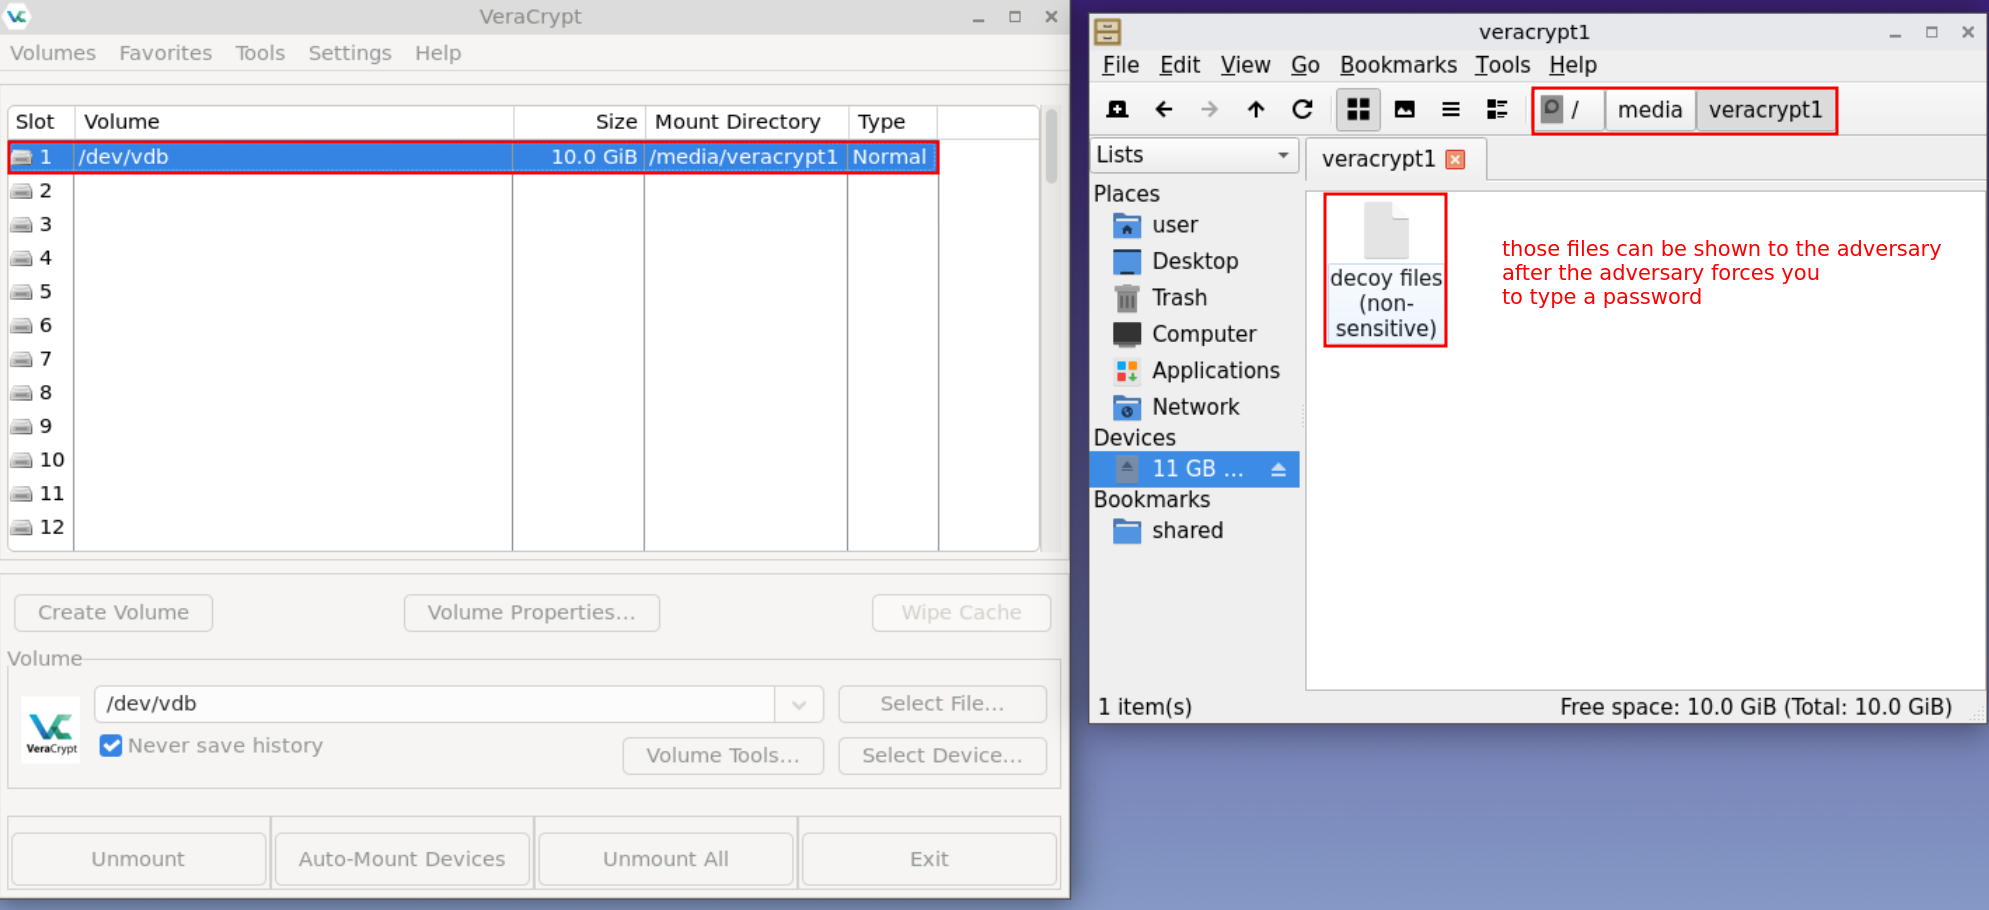
This (the decoy volume) is the volume you're going to mount whenever an adversary forces you to type a password, it should only contain files that are non-sensitive (nothing to incriminate you with).
And as you can see, the decoy volume once mounted spans the entire non-system drive (in this case 10GB). So if you were forced to open it for an adversary, they would only find non-sensitive files (for example pirated movies or adult content) that are stored in it. And since the volume spans the entire drive, you can deny the existence of any other encrypted volume in there, and the adversary would be unable to prove otherwise. This means that our deniability is maintained.
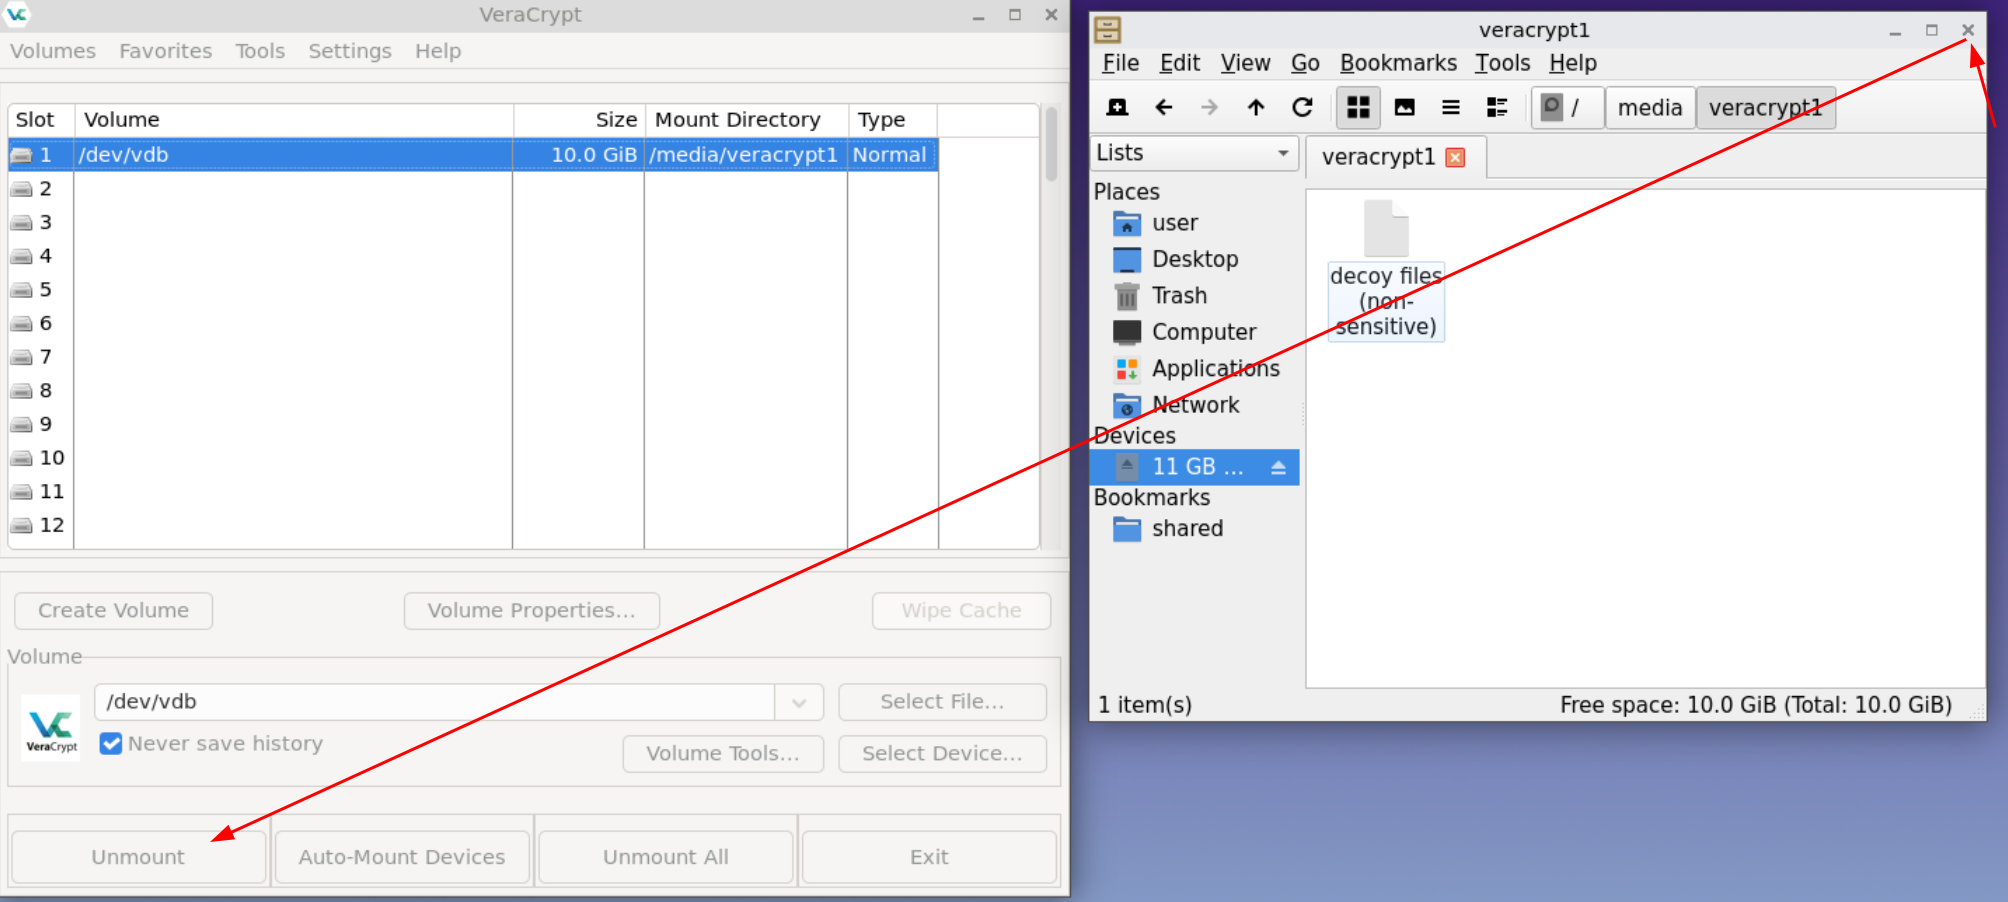
Now let's unmount it:
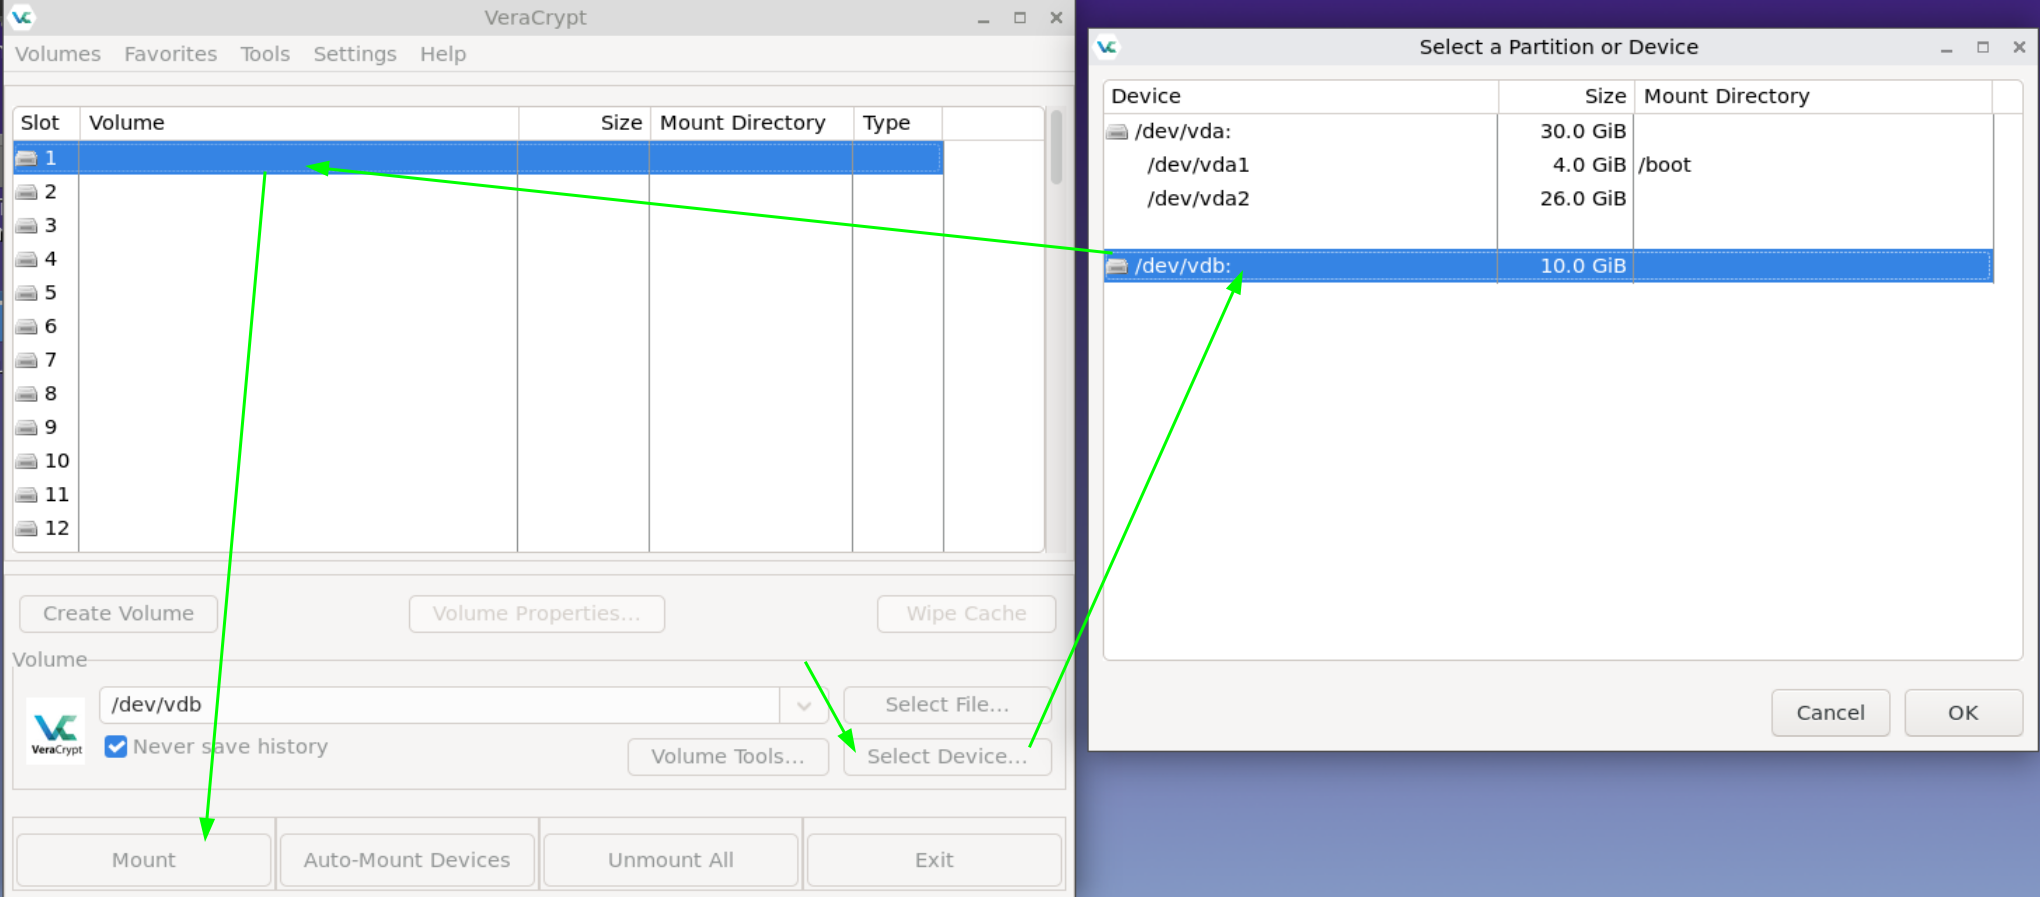
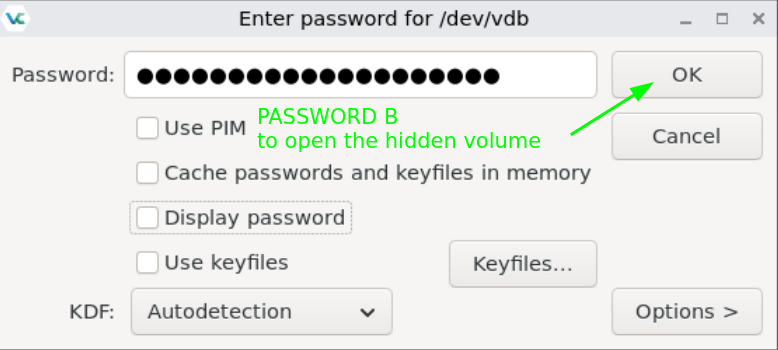
and let's mount the hidden volume instead: (KEEP IN MIND THAT YOU CAN ONLY MOUNT THE HIDDEN VOLUME FROM A LIVE SESSION, DO NOT DO THAT FROM A PERSISTENT SESSION!)
At this step you need to make sure that no one is watching you type this second password, as this second volume needs to remain a secret at all costs, its existence is only to be known by you.
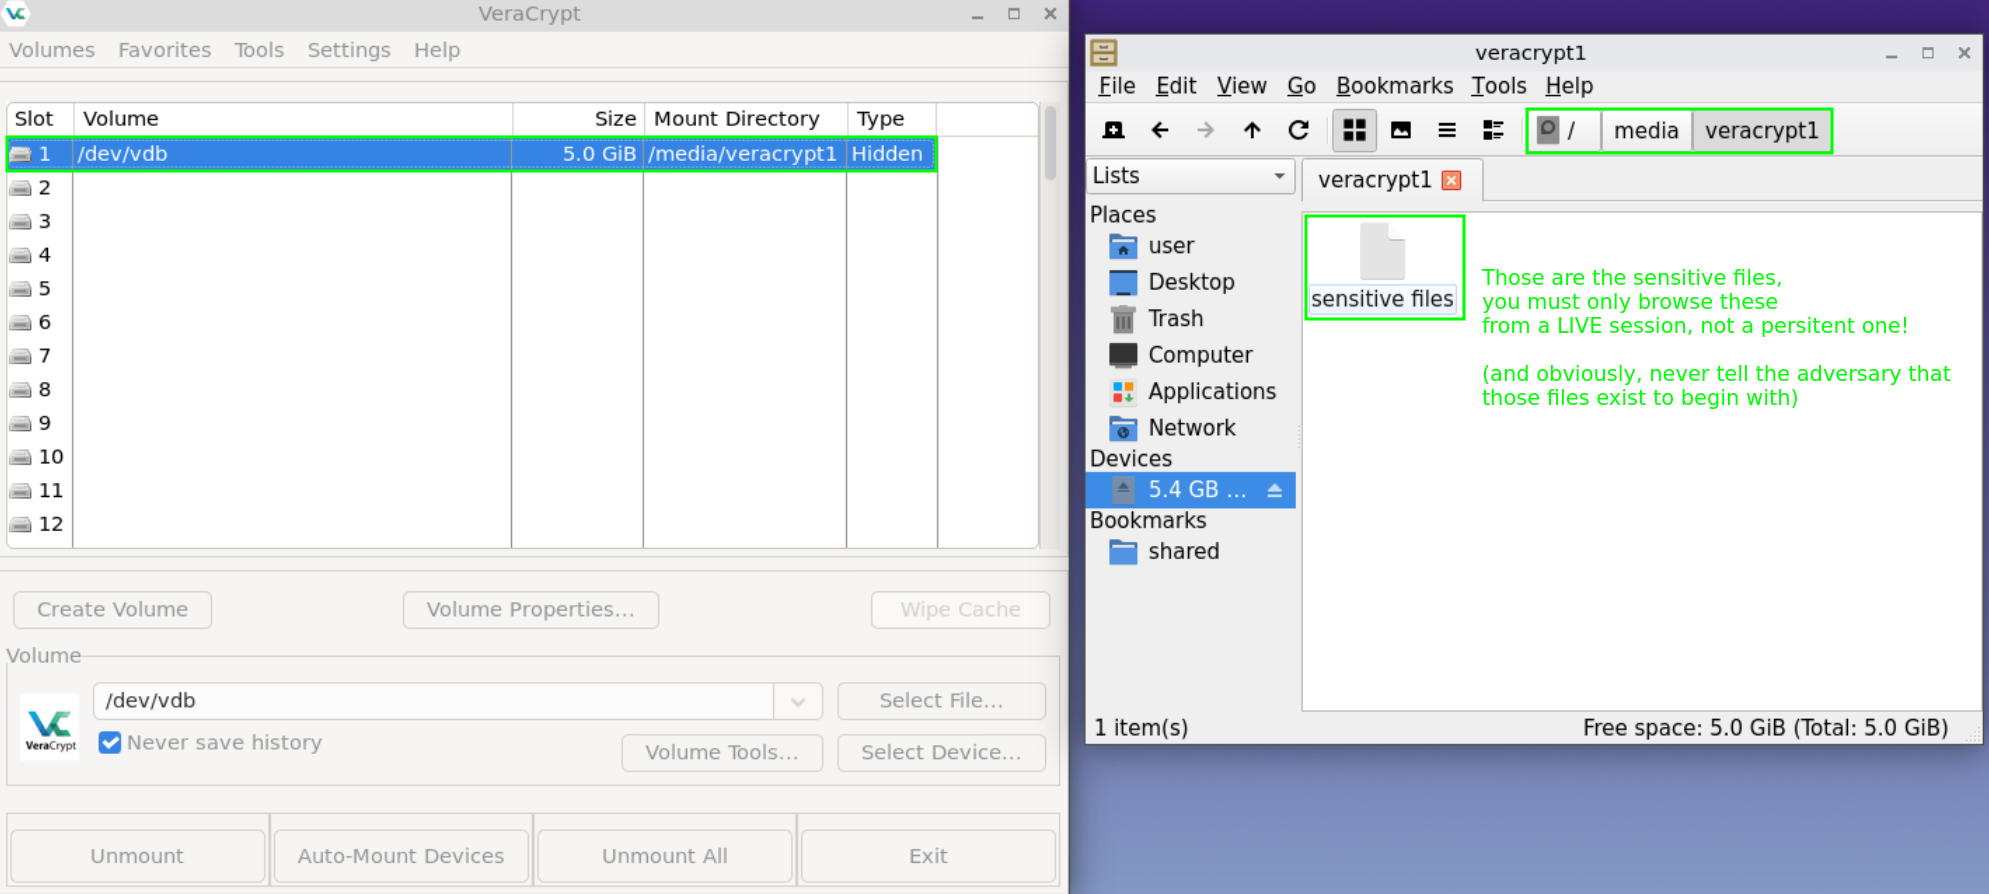
And now after unlocking the hidden volume (and revealing its existence at the same time), we see that it is 5GB big, as intended. And it is only in that hidden volume, that you can safely store your sensitive files which are meant to remain secret at all costs.
And that's it! We now managed to open the hidden volume as well, allowing us to browse your sensitive files from a live session.
If there were to be any emergency where someone would be close to discovering that there is a hidden volume (meaning the adversary is busting down your door and is almost next to your monitor) all you need is to press Right Control to immediately reboot the host OS, to be able to erase all forensic proof (that is contained within RAM) that the hidden volume exists.
 Suggest changes
 Nihilist & Oxeo0
 2025-04-01
 Donate XMR to the author:
862Sp3N5Y8NByFmPVLTPrJYzwdiiVxkhQgAdt65mpYKJLdVDHyYQ8swLgnVr8D3jKphDUcWUCVK1vZv9u8cvtRJCUBFb8MQ